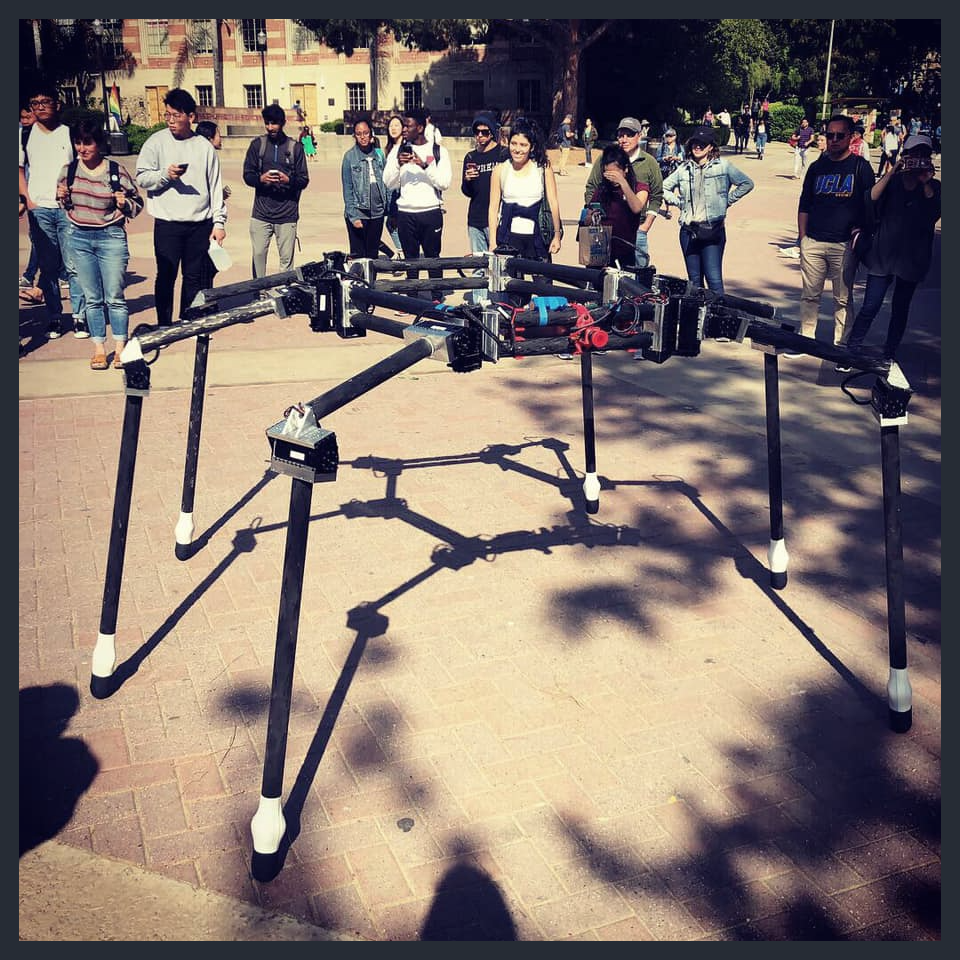
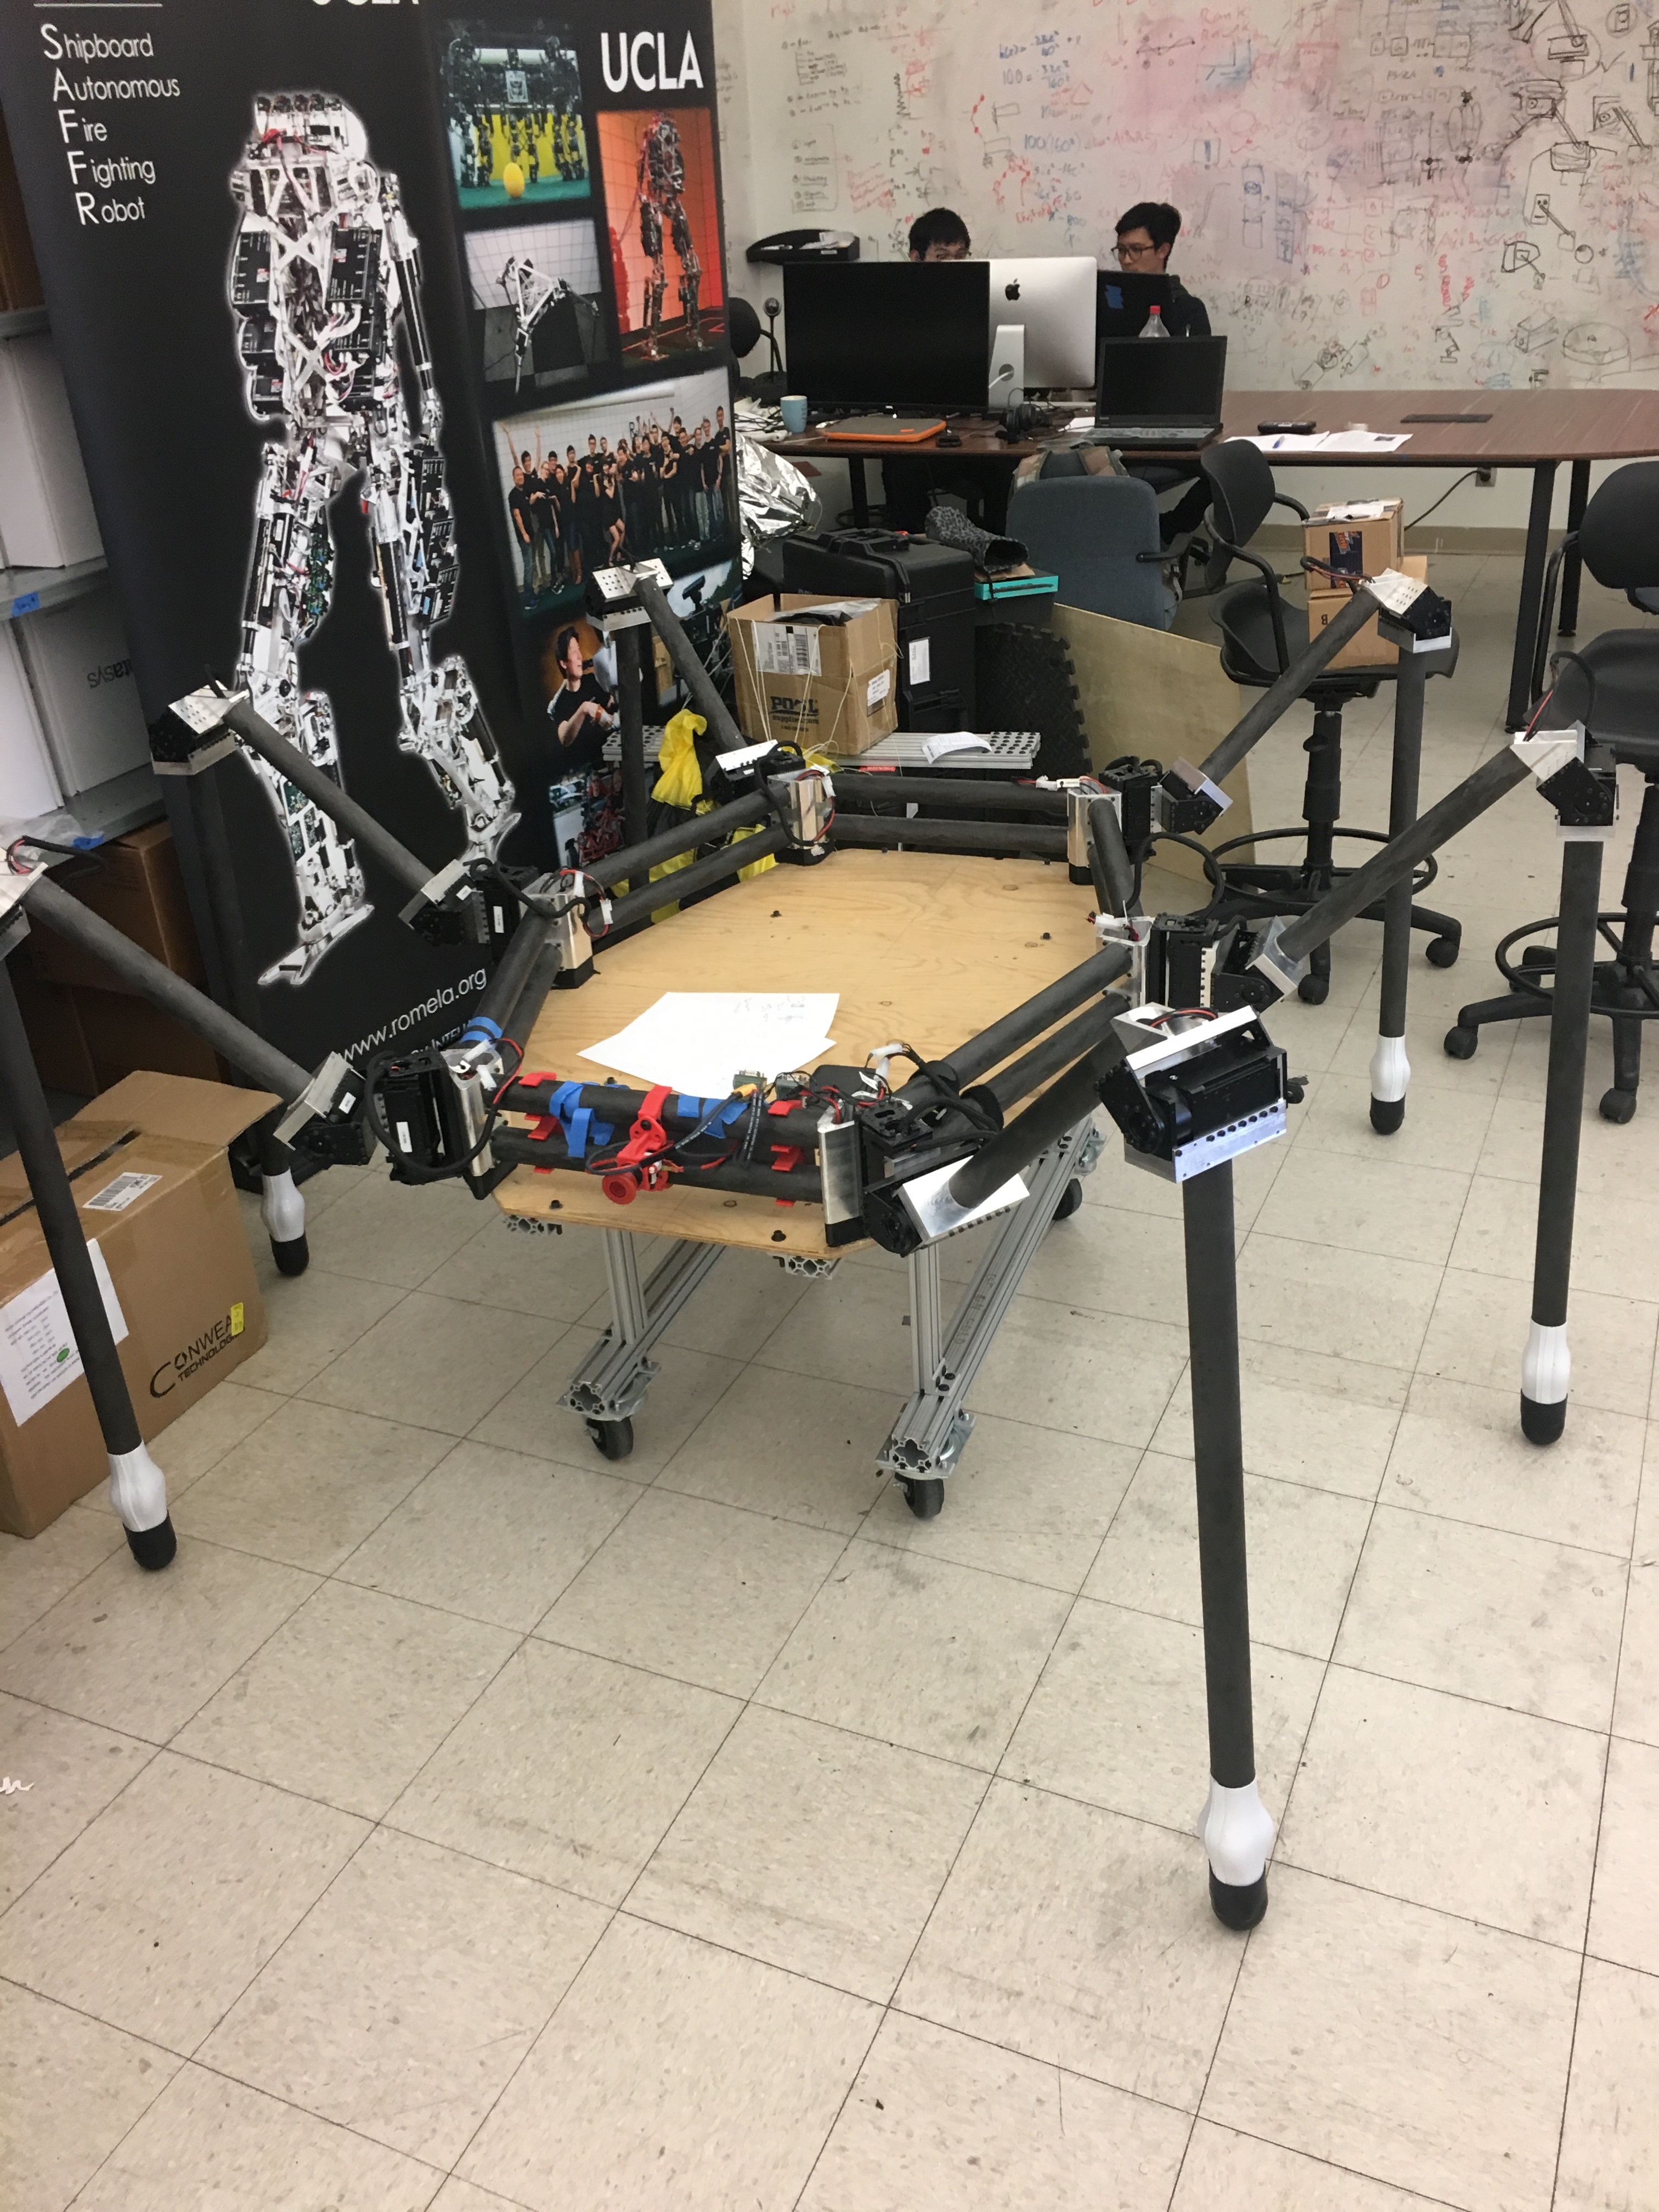
Hexapod Enhancement Project (HEX)
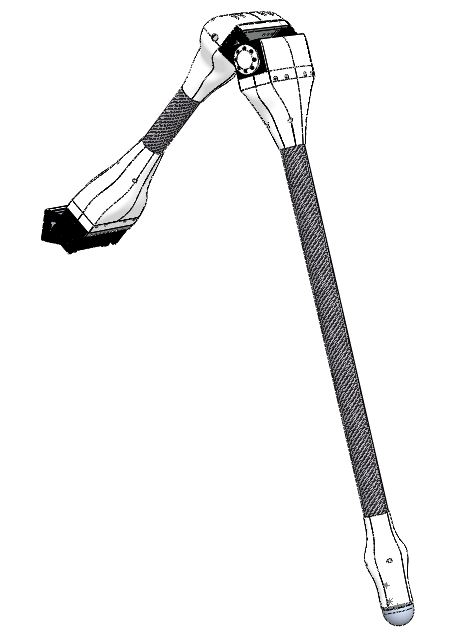
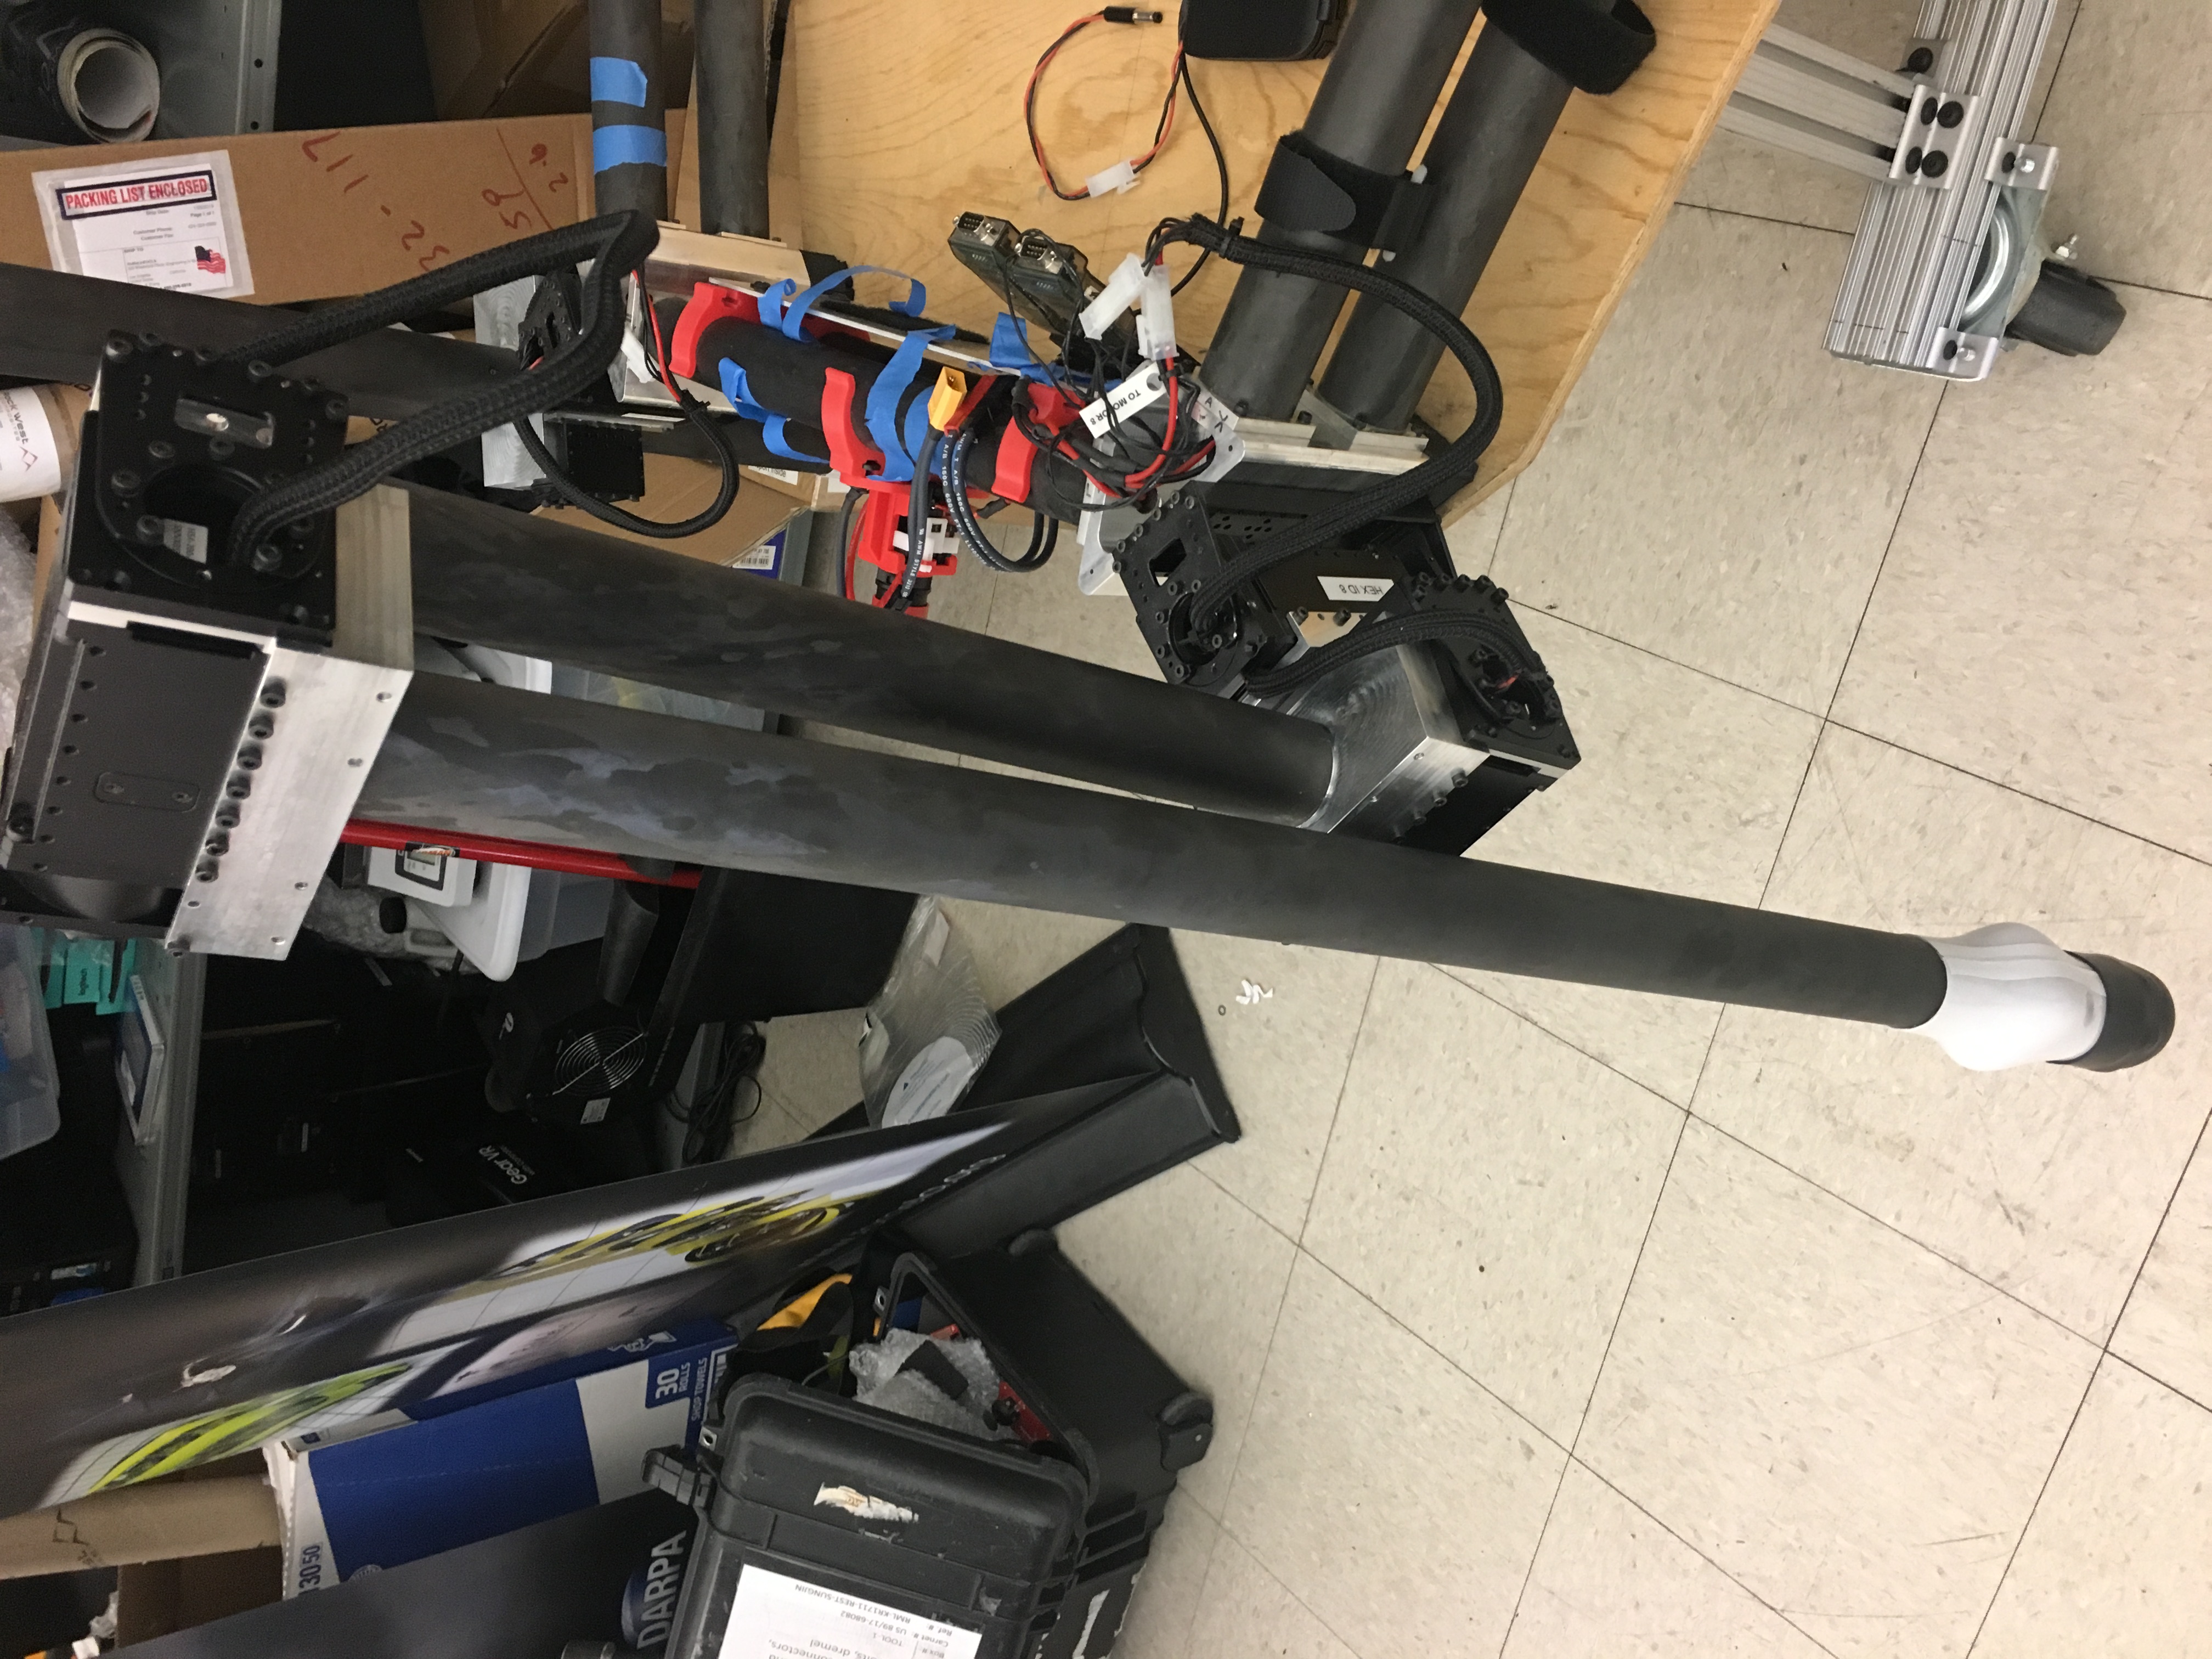
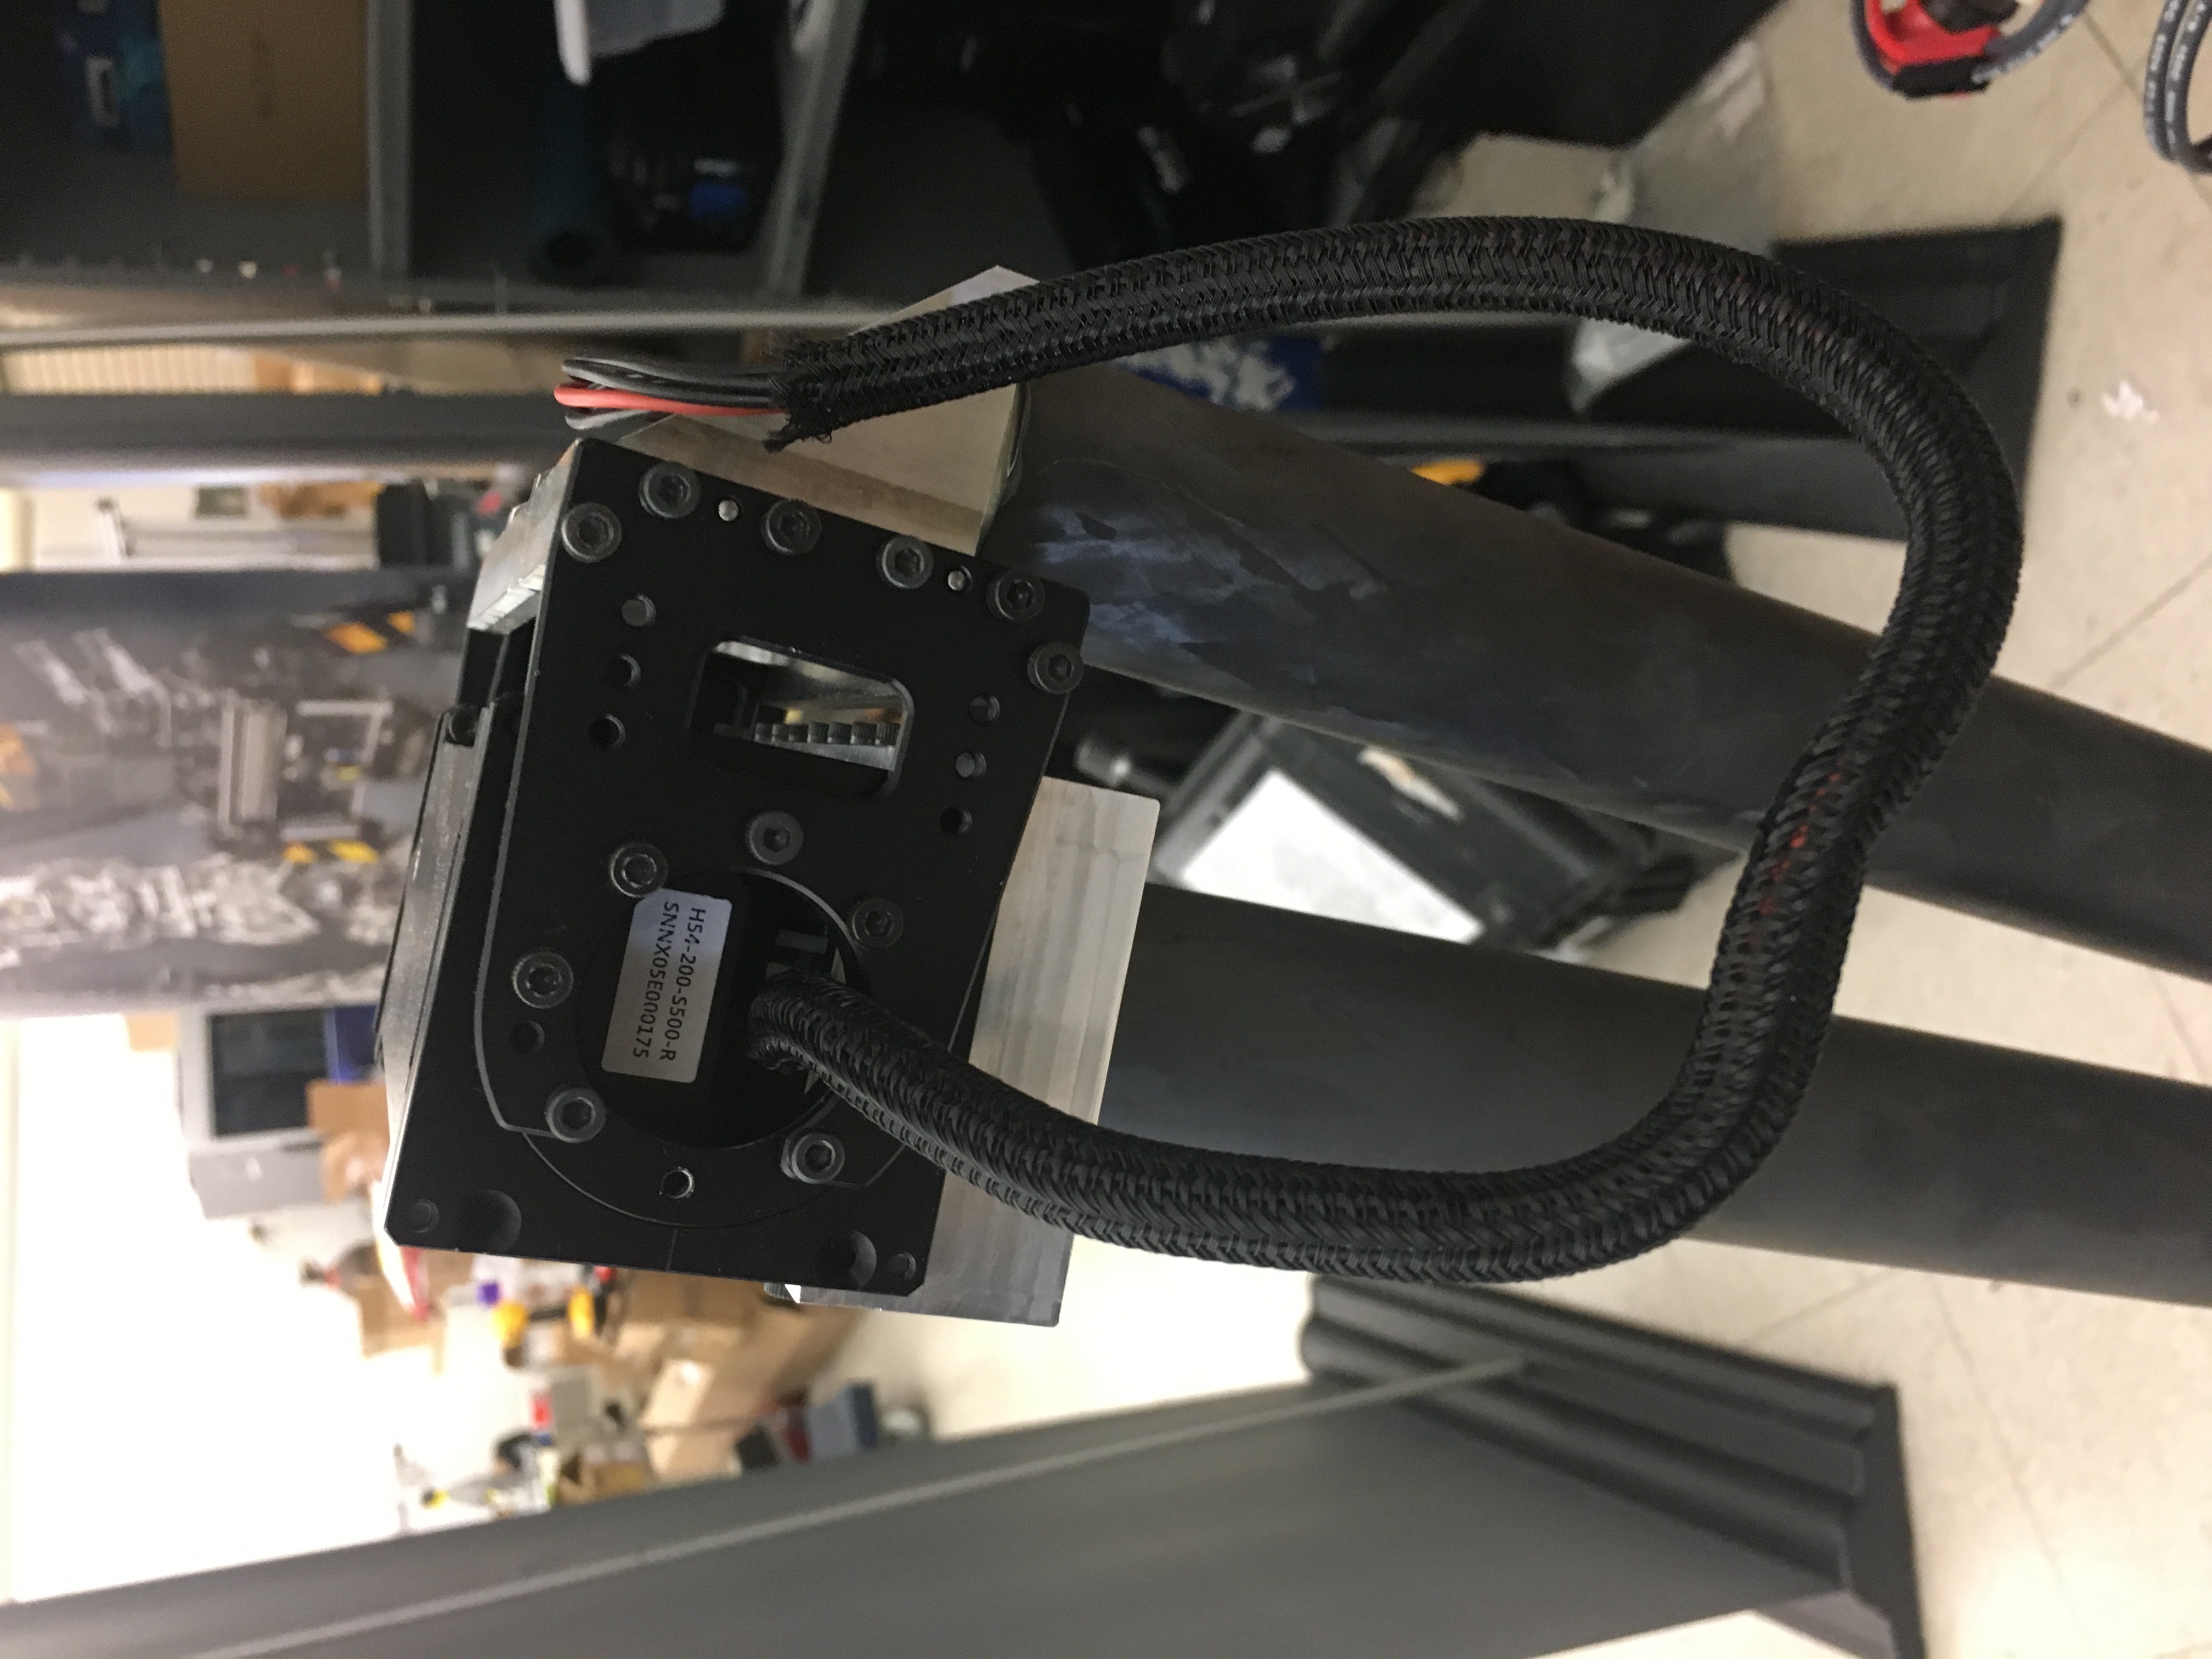
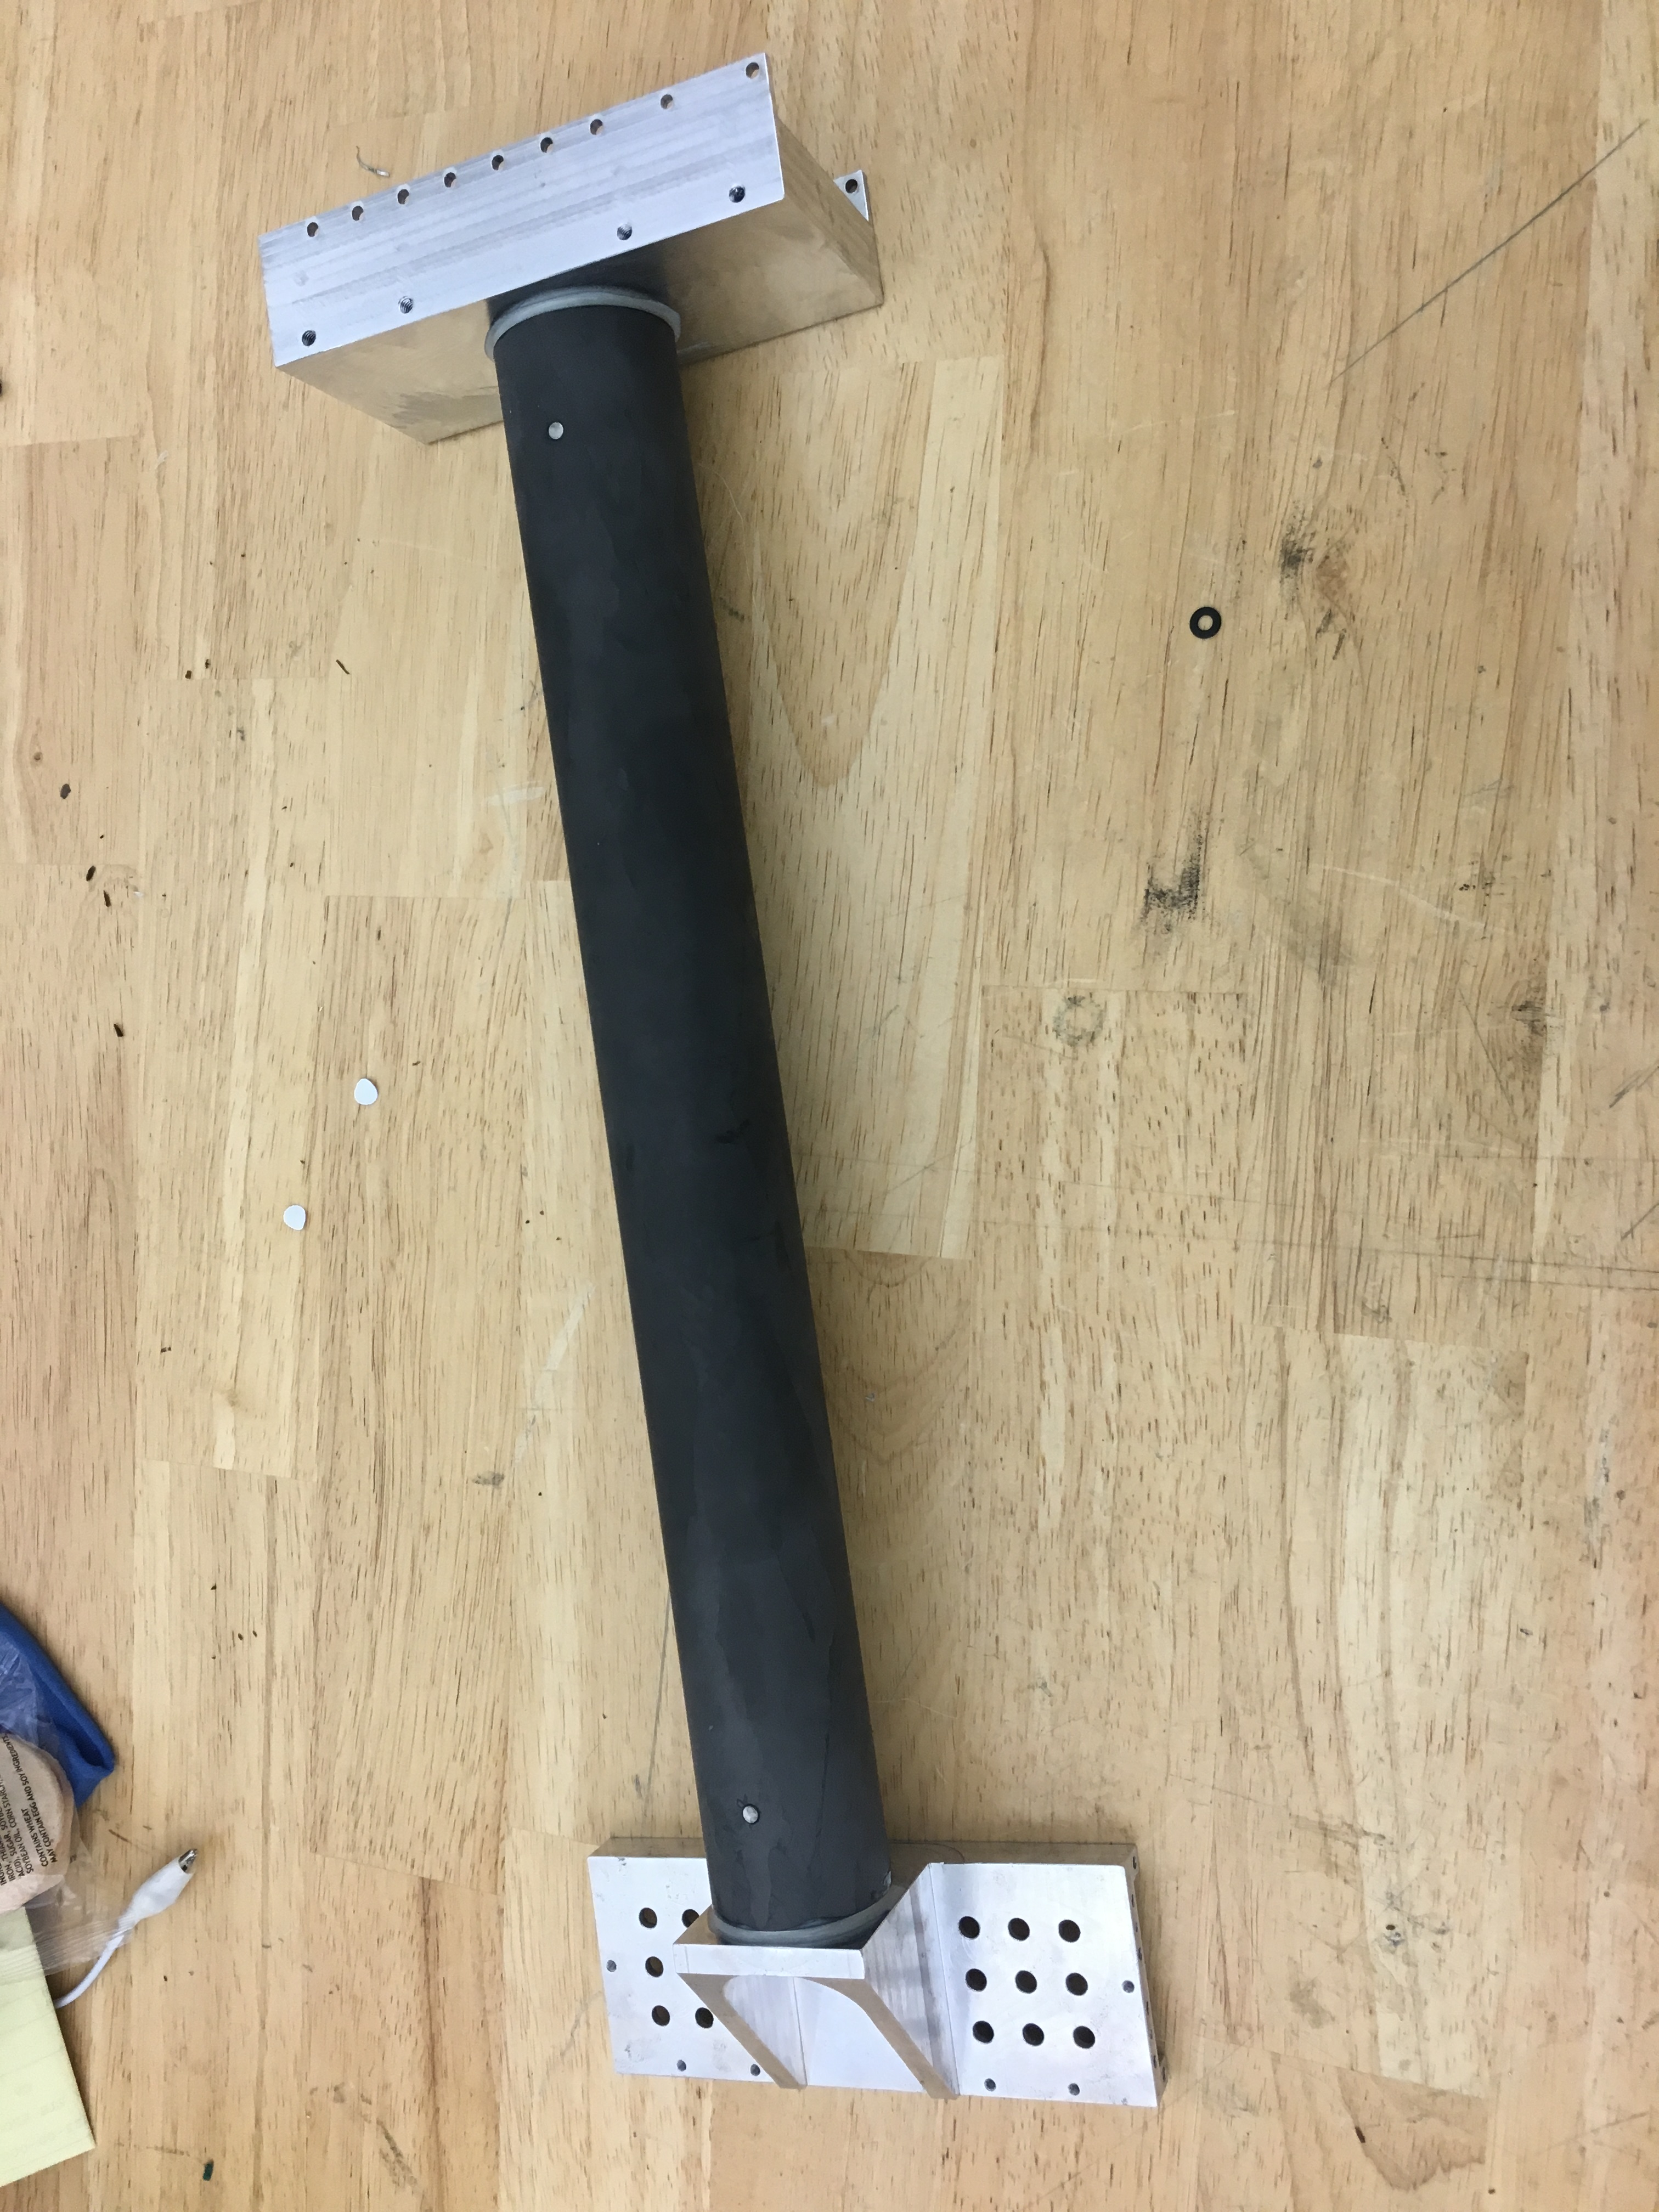
During the summer of 2018, I spearheaded my own project called the Hexapod Enhancement Experiment (HEX) in the Robotics and Mechanisms Lab at UCLA. Powered by Dynamixel Pro H54-200-S500-R actuators, the hexapod is designed to have a large footprint for future developments allowing the hexapod to crouch over and dig through the ground for buried objects. My particular focus was redesigning the legs of the robot.
Design and Finite Element Analysis
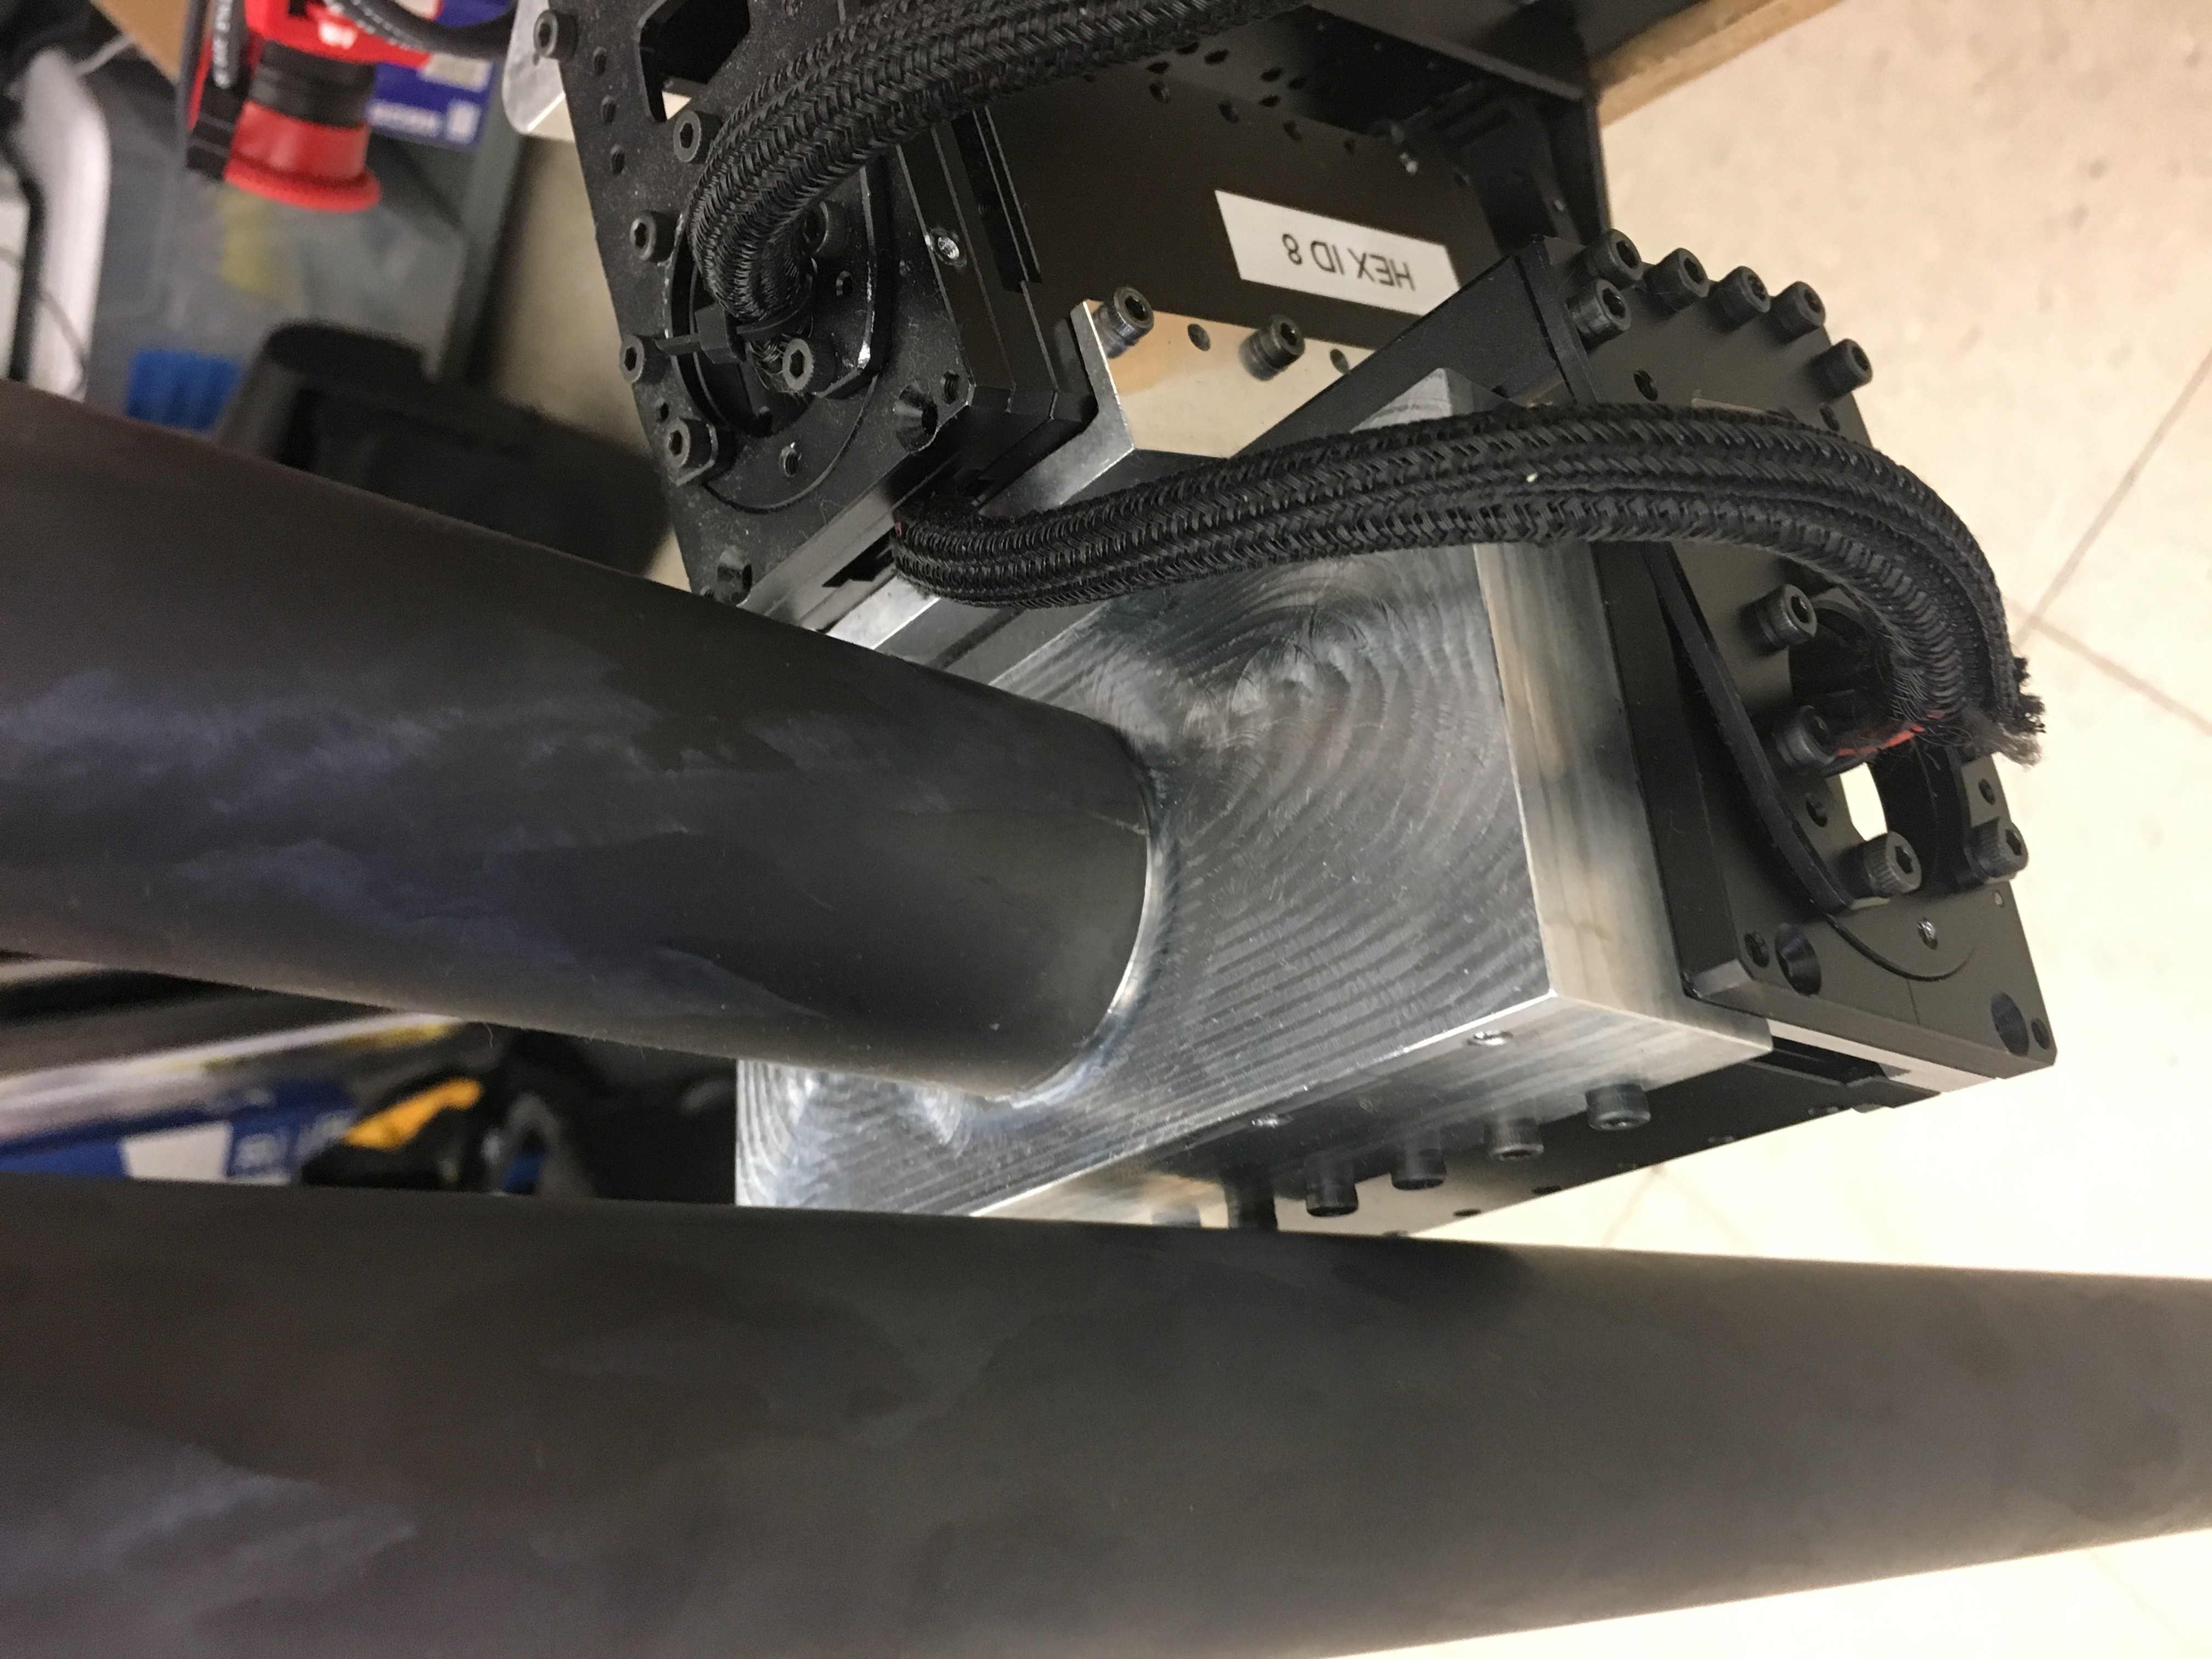
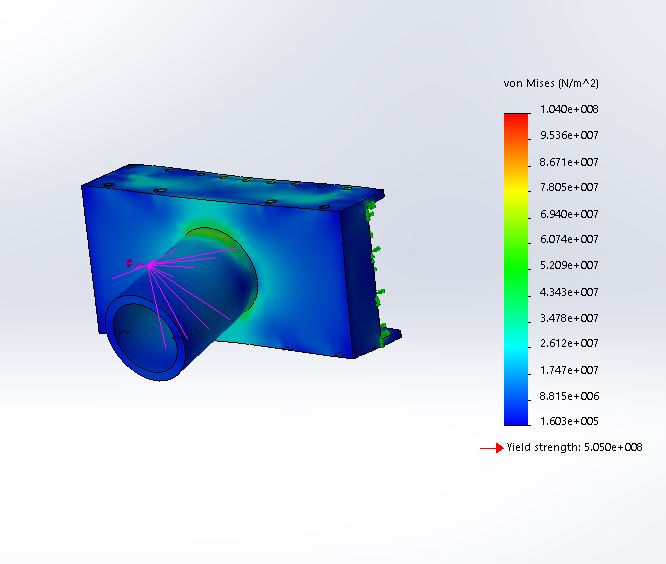
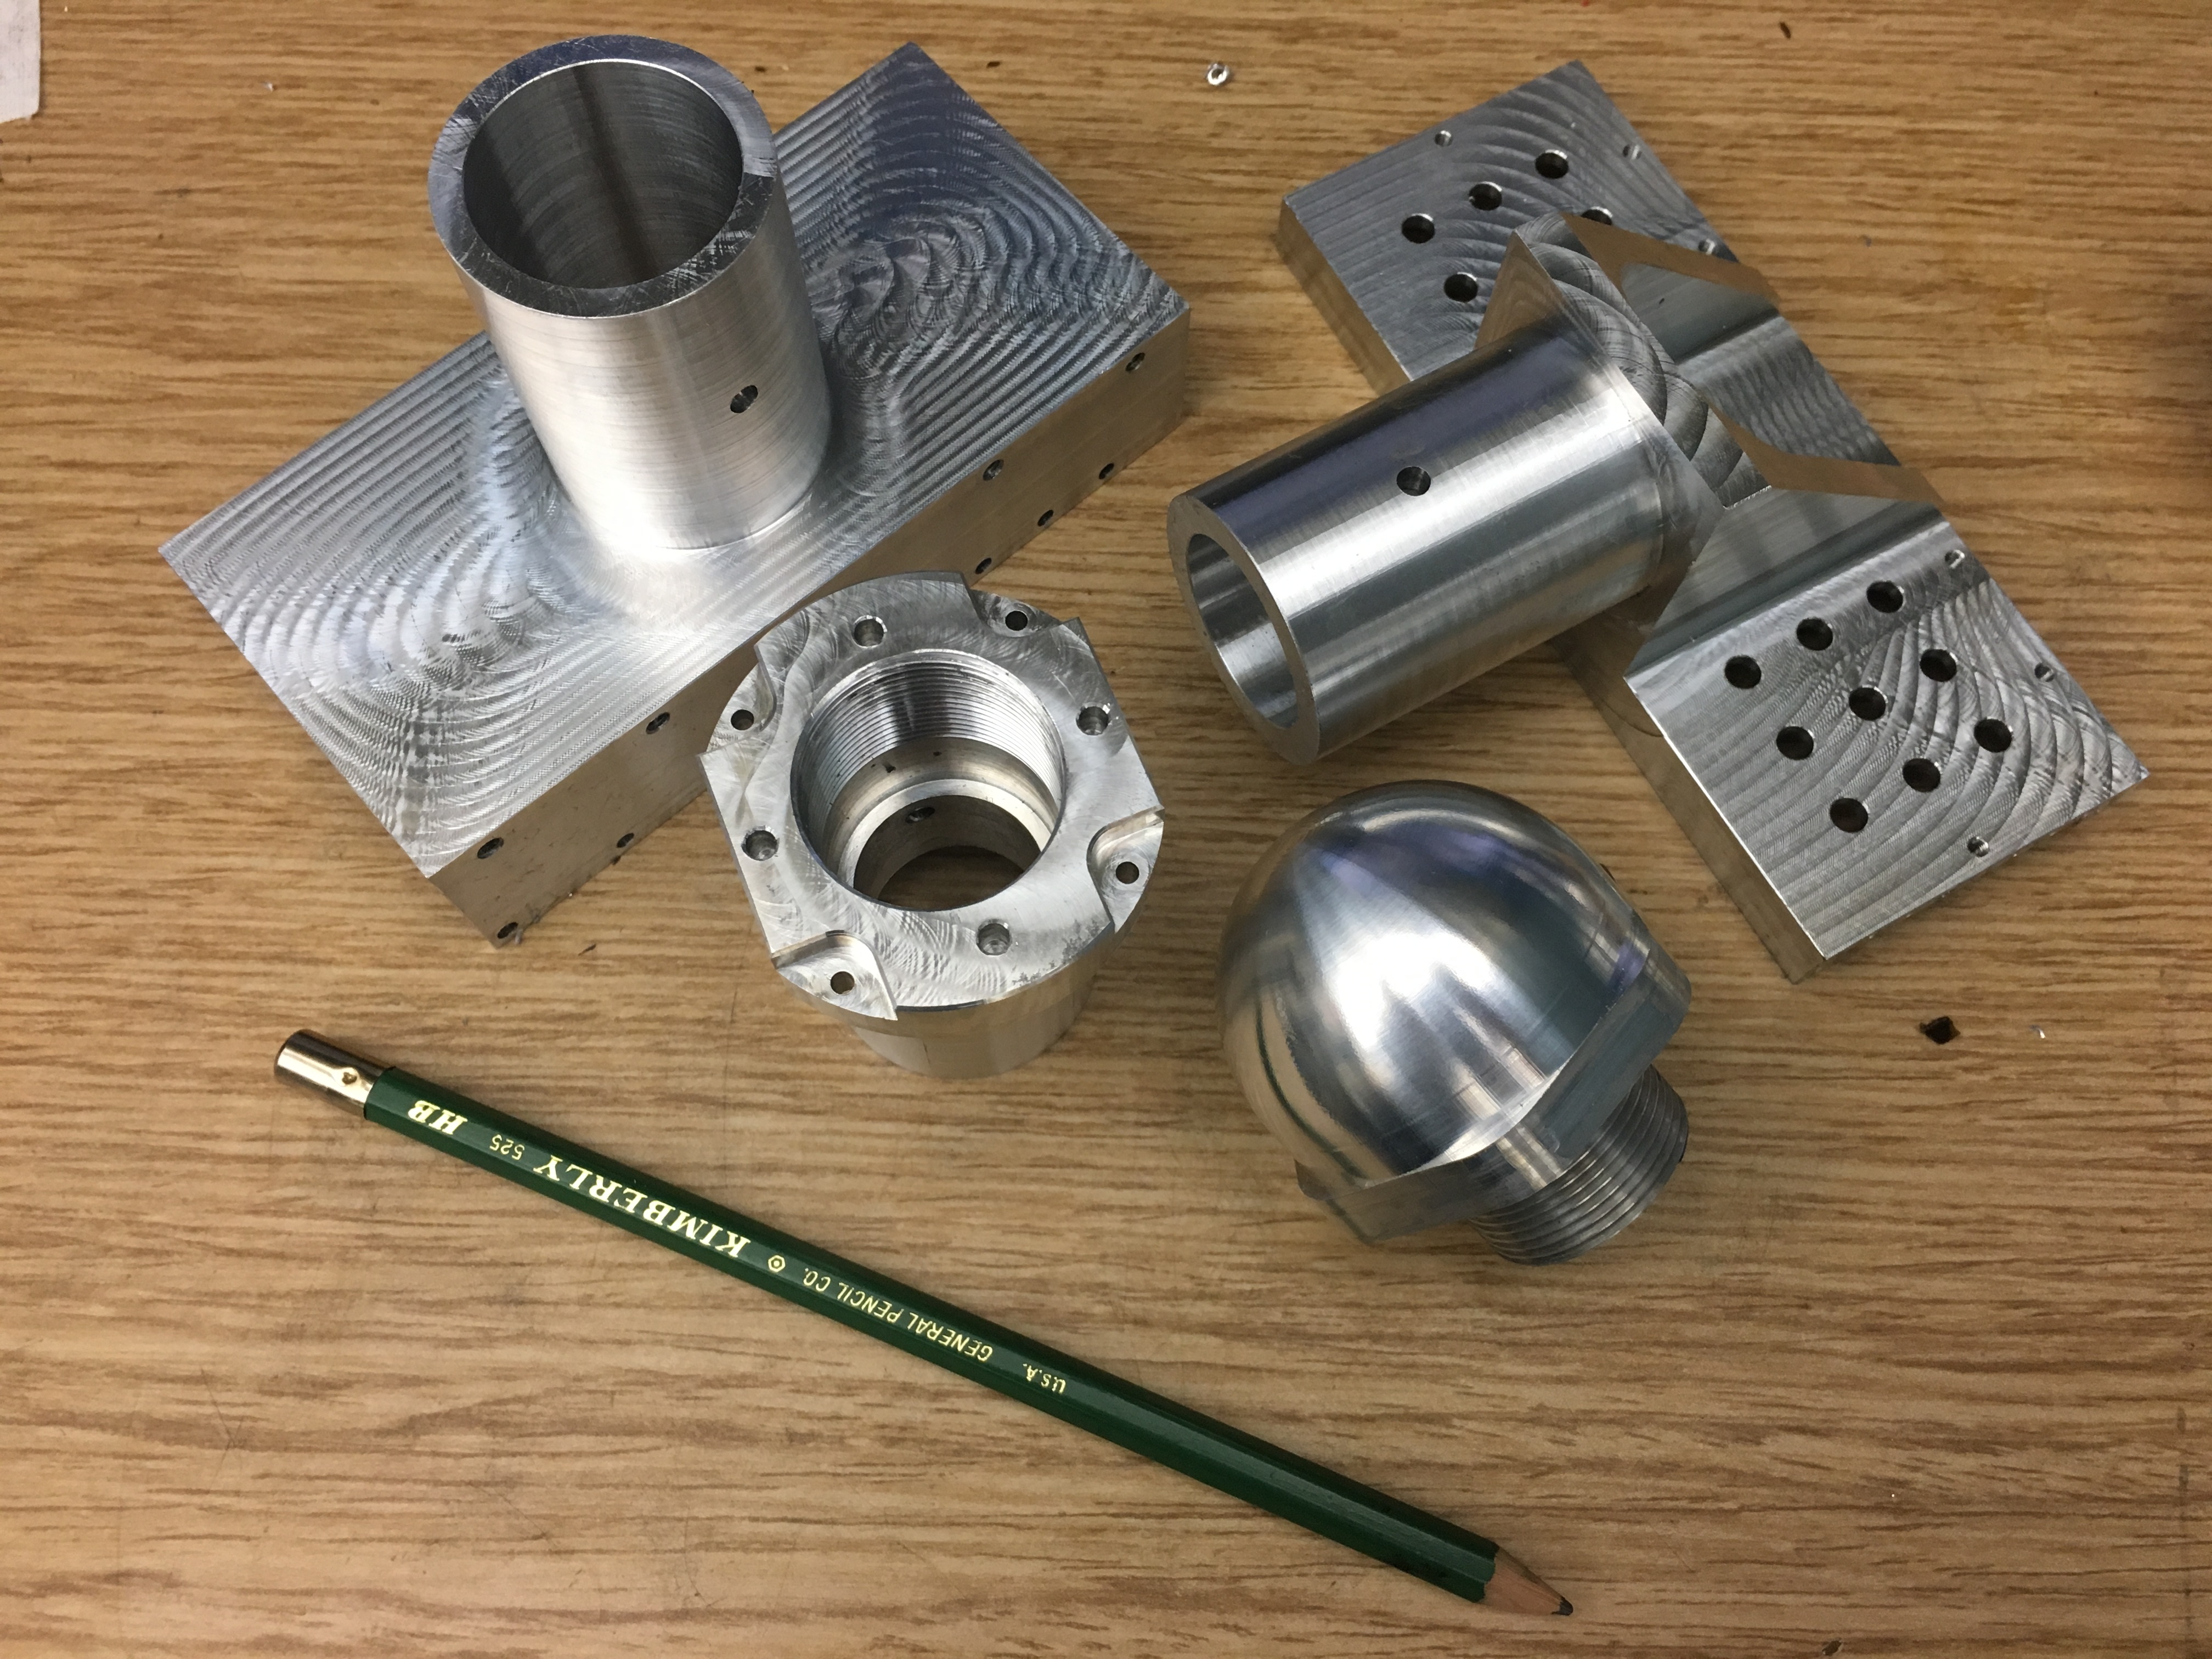
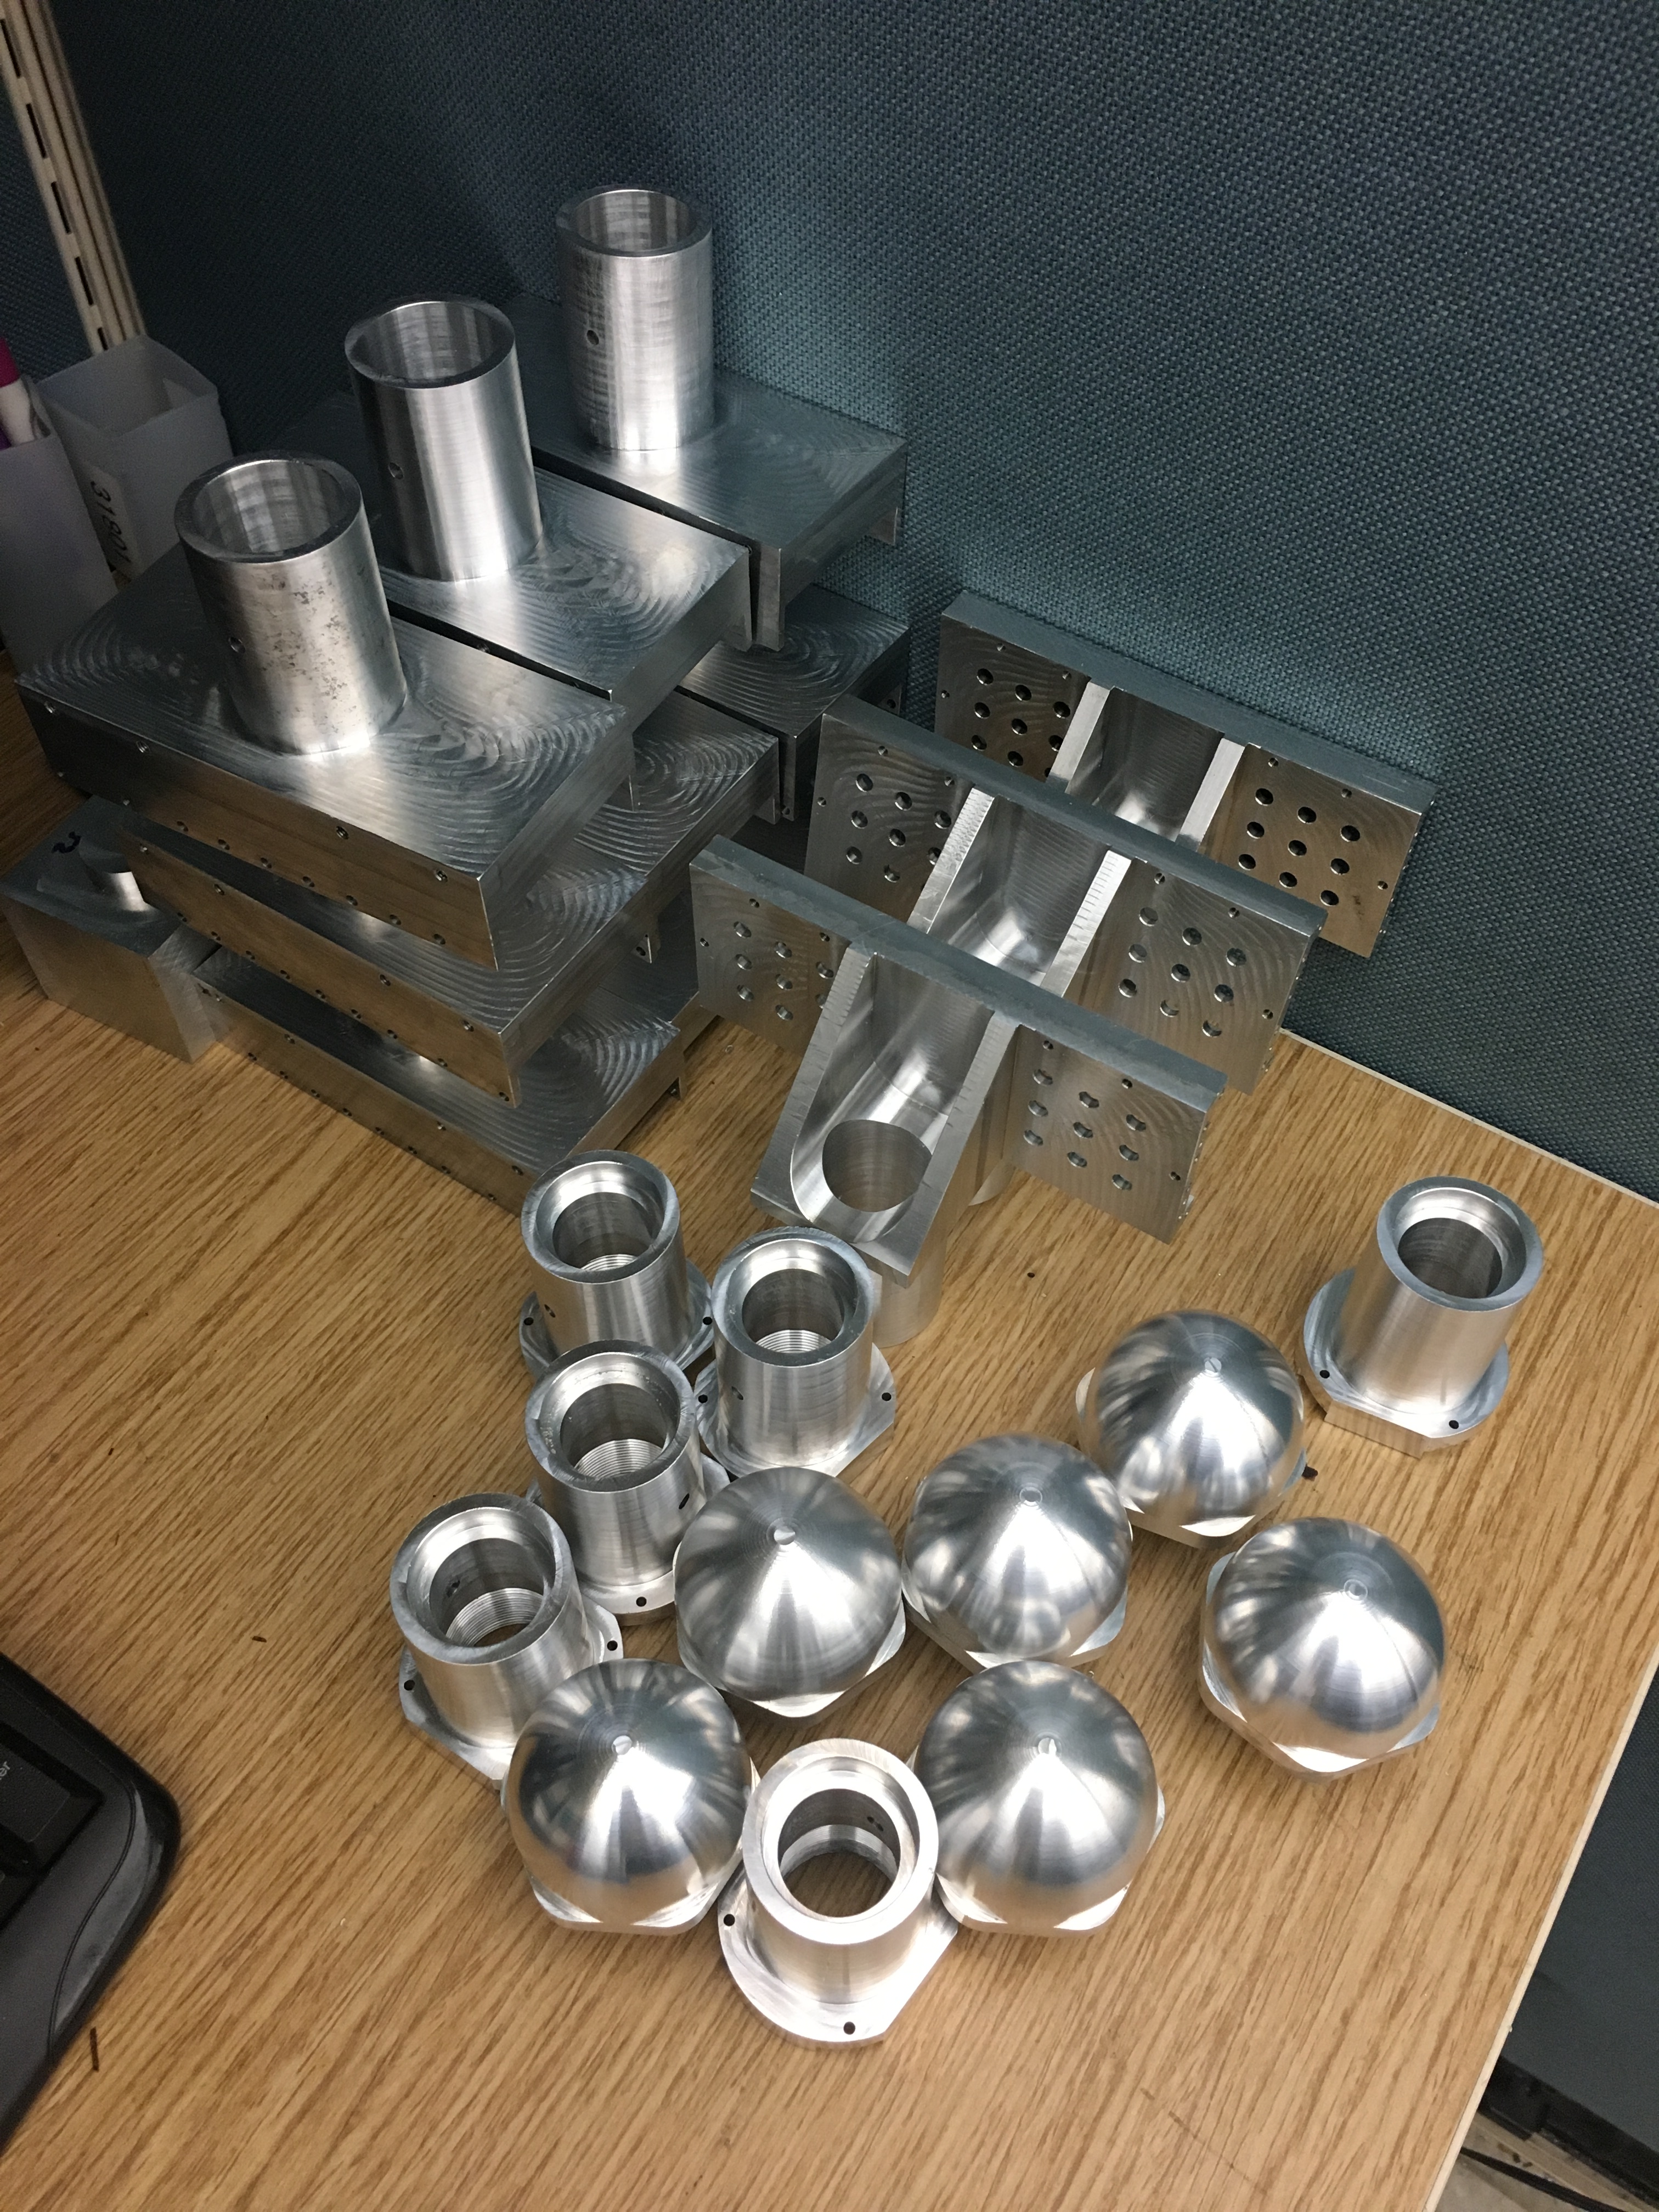
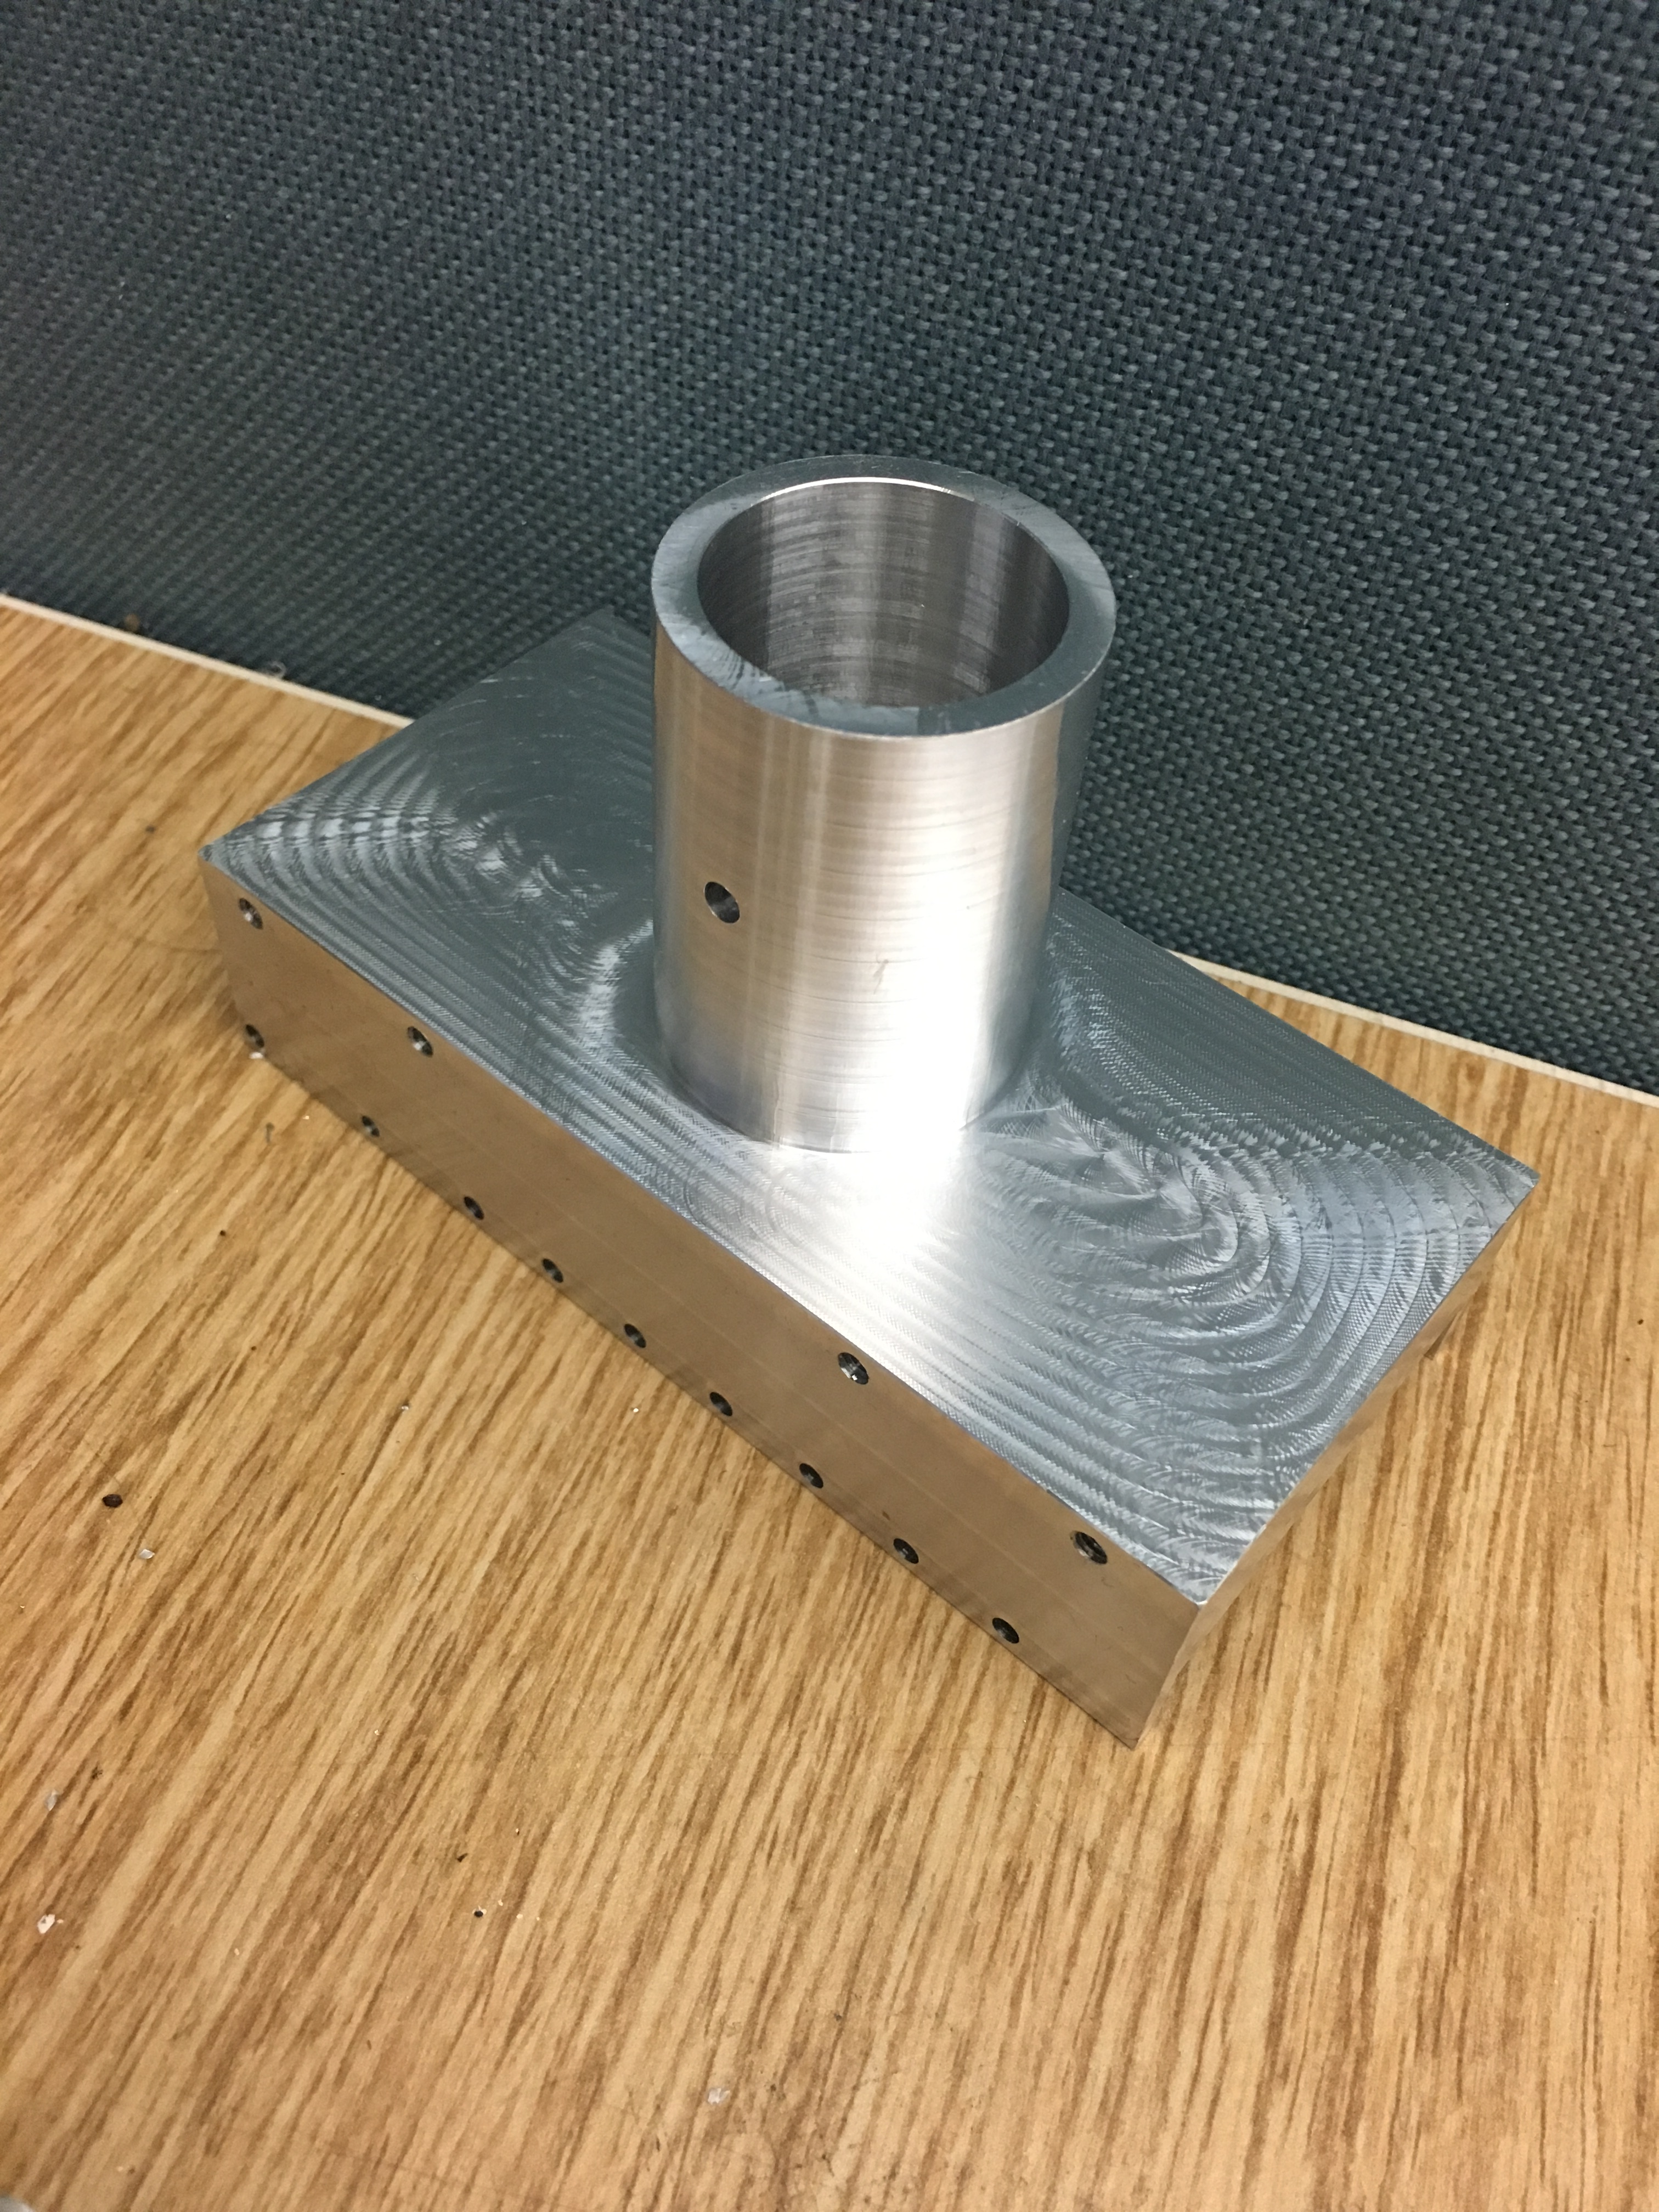
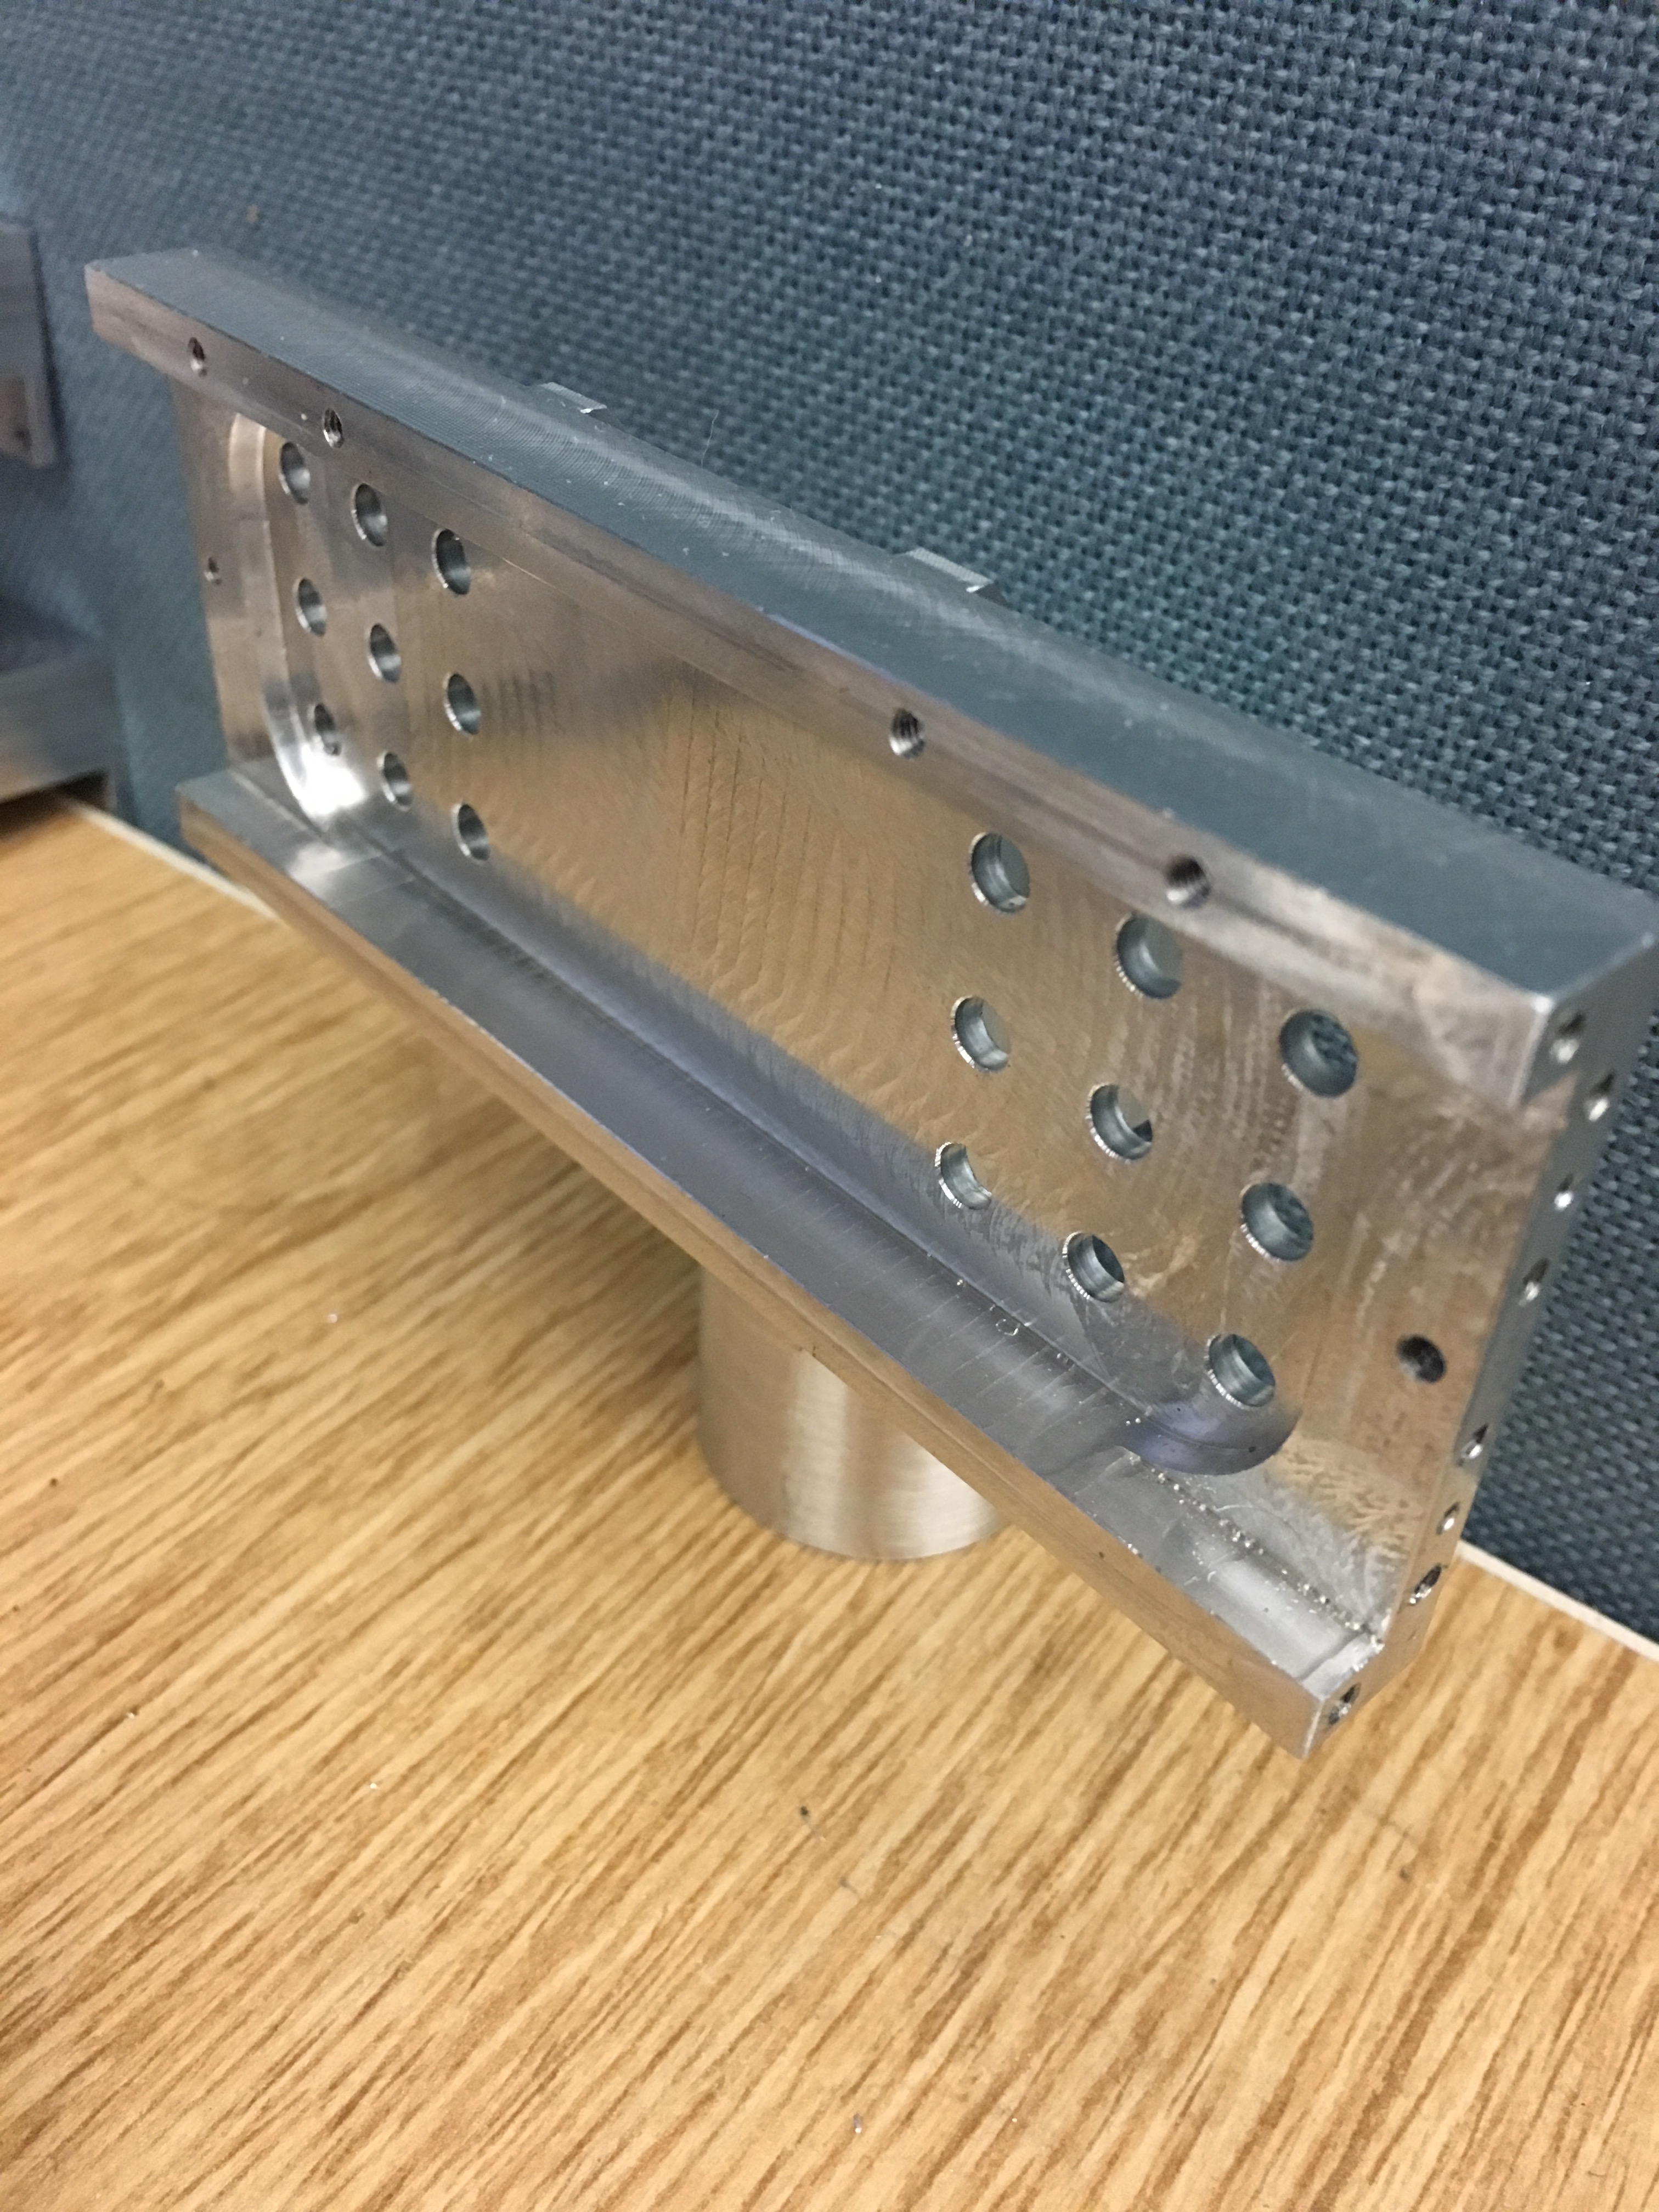
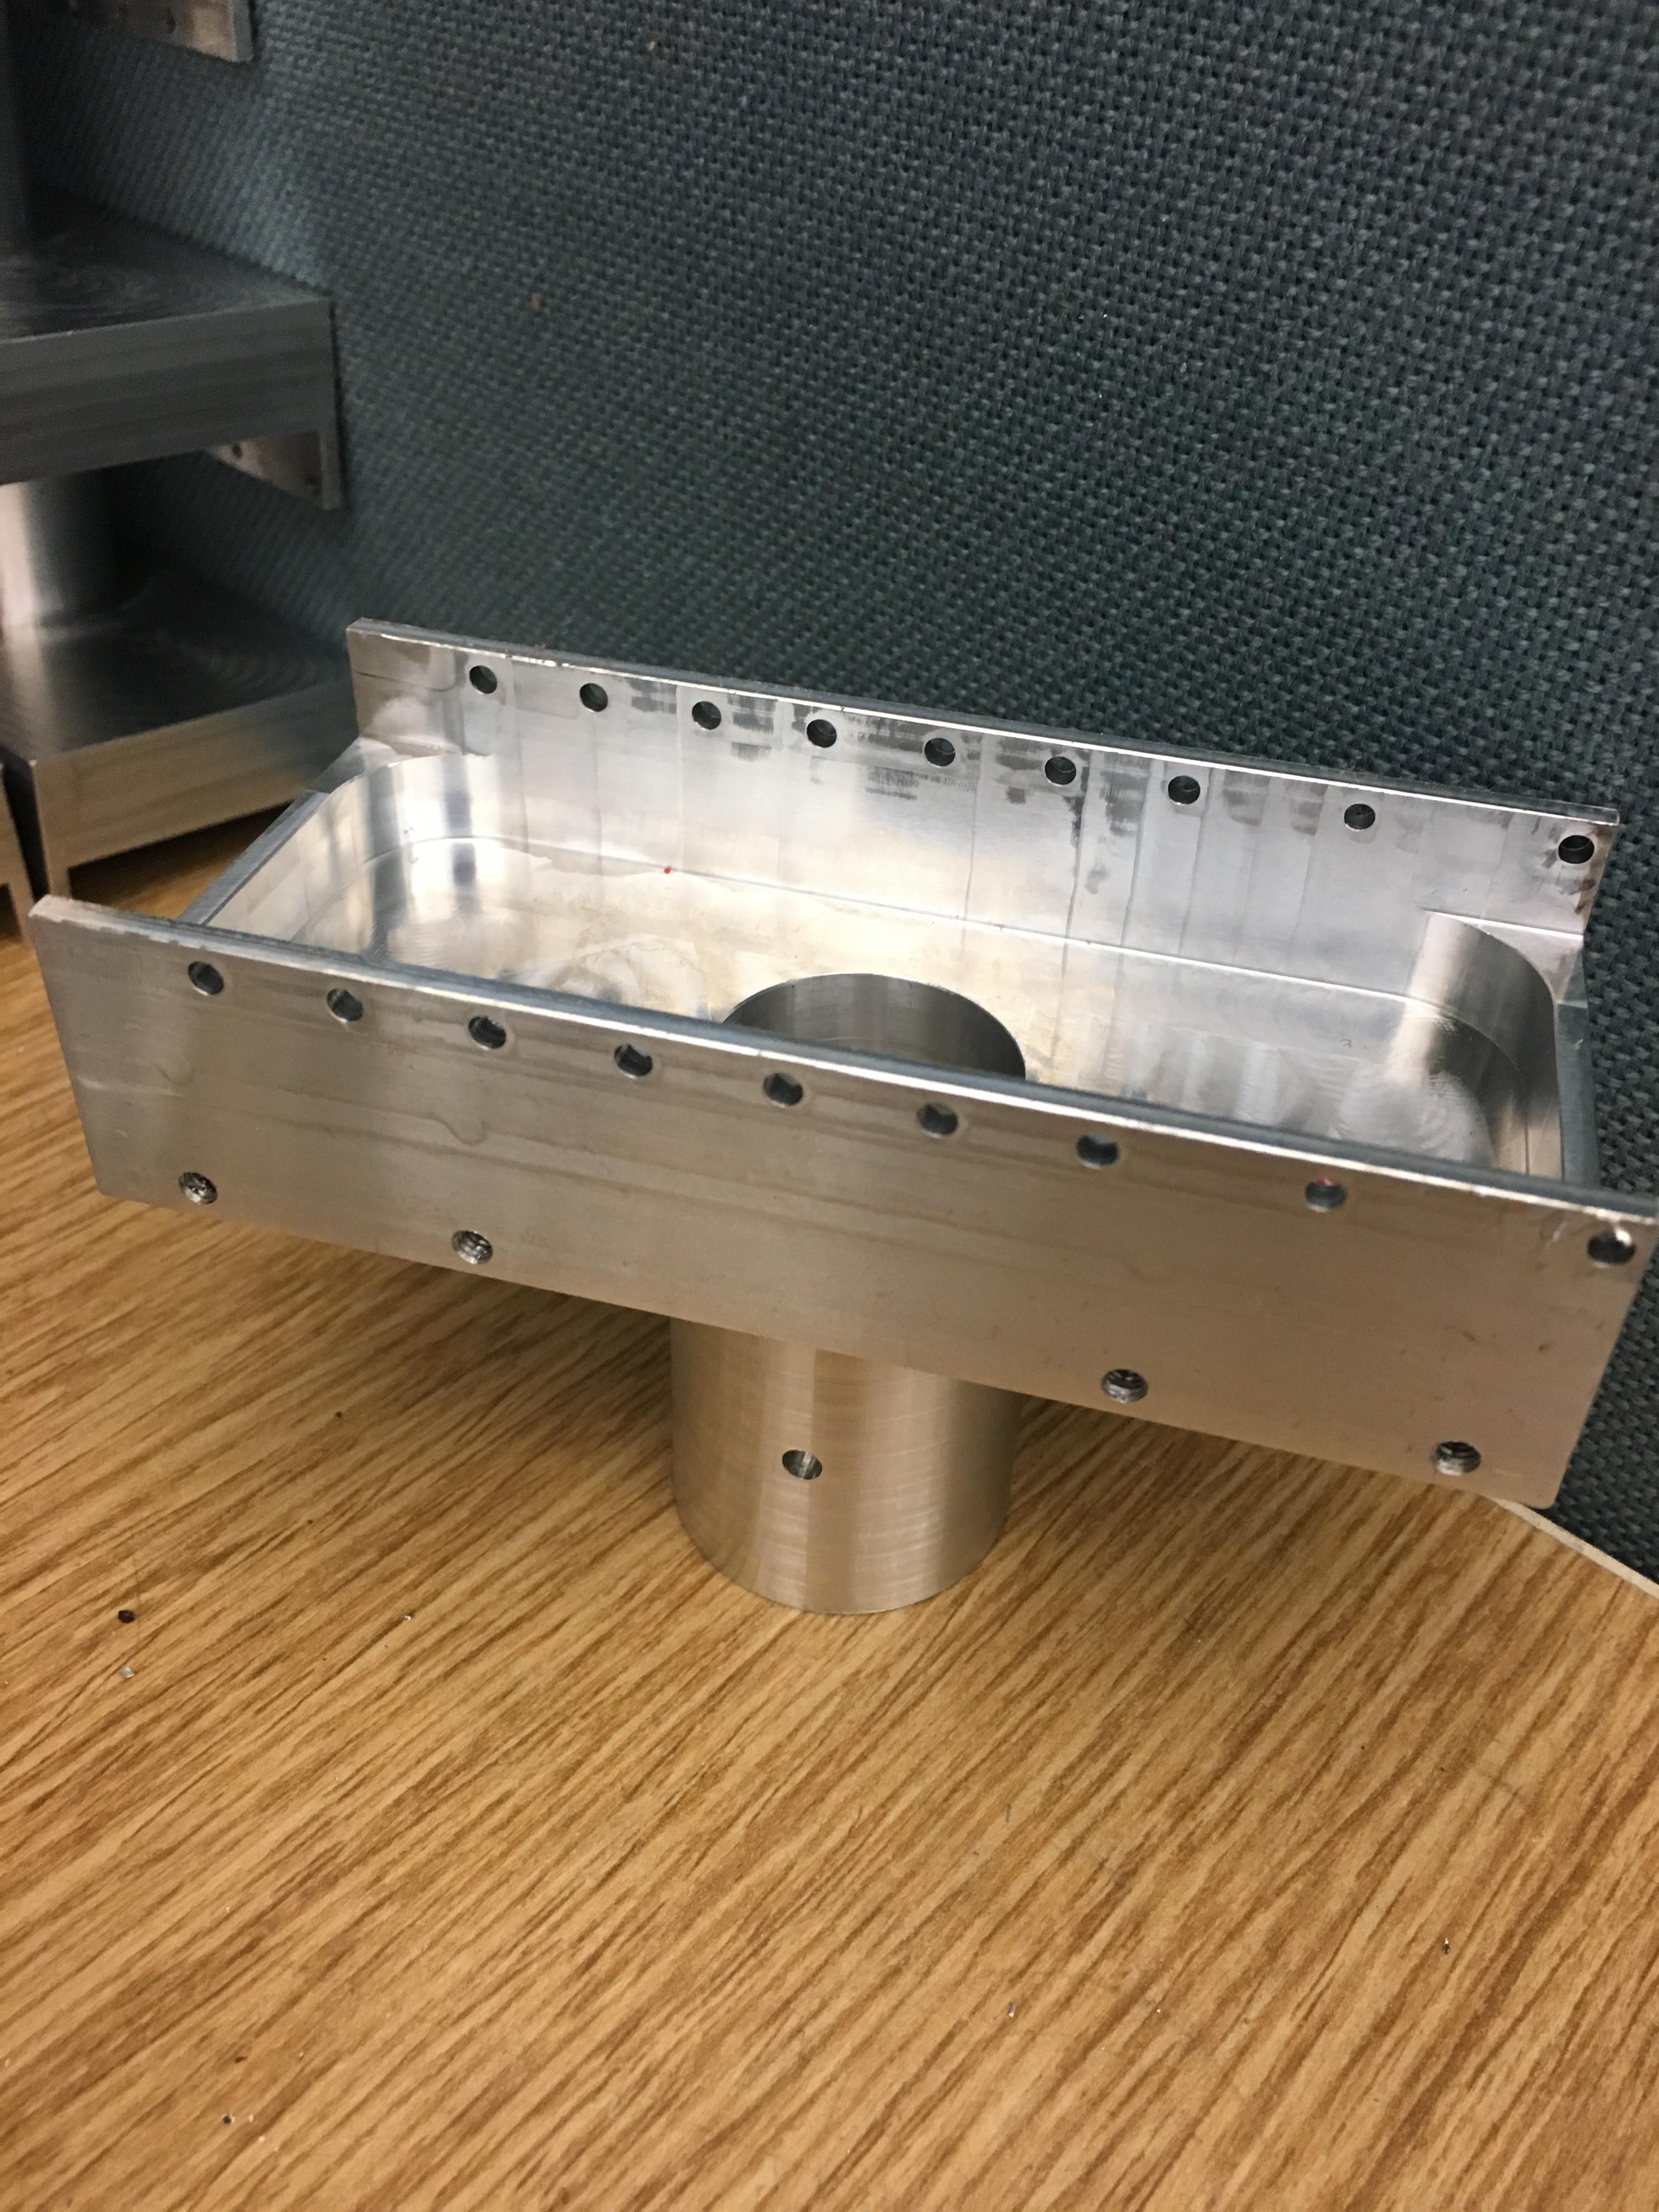
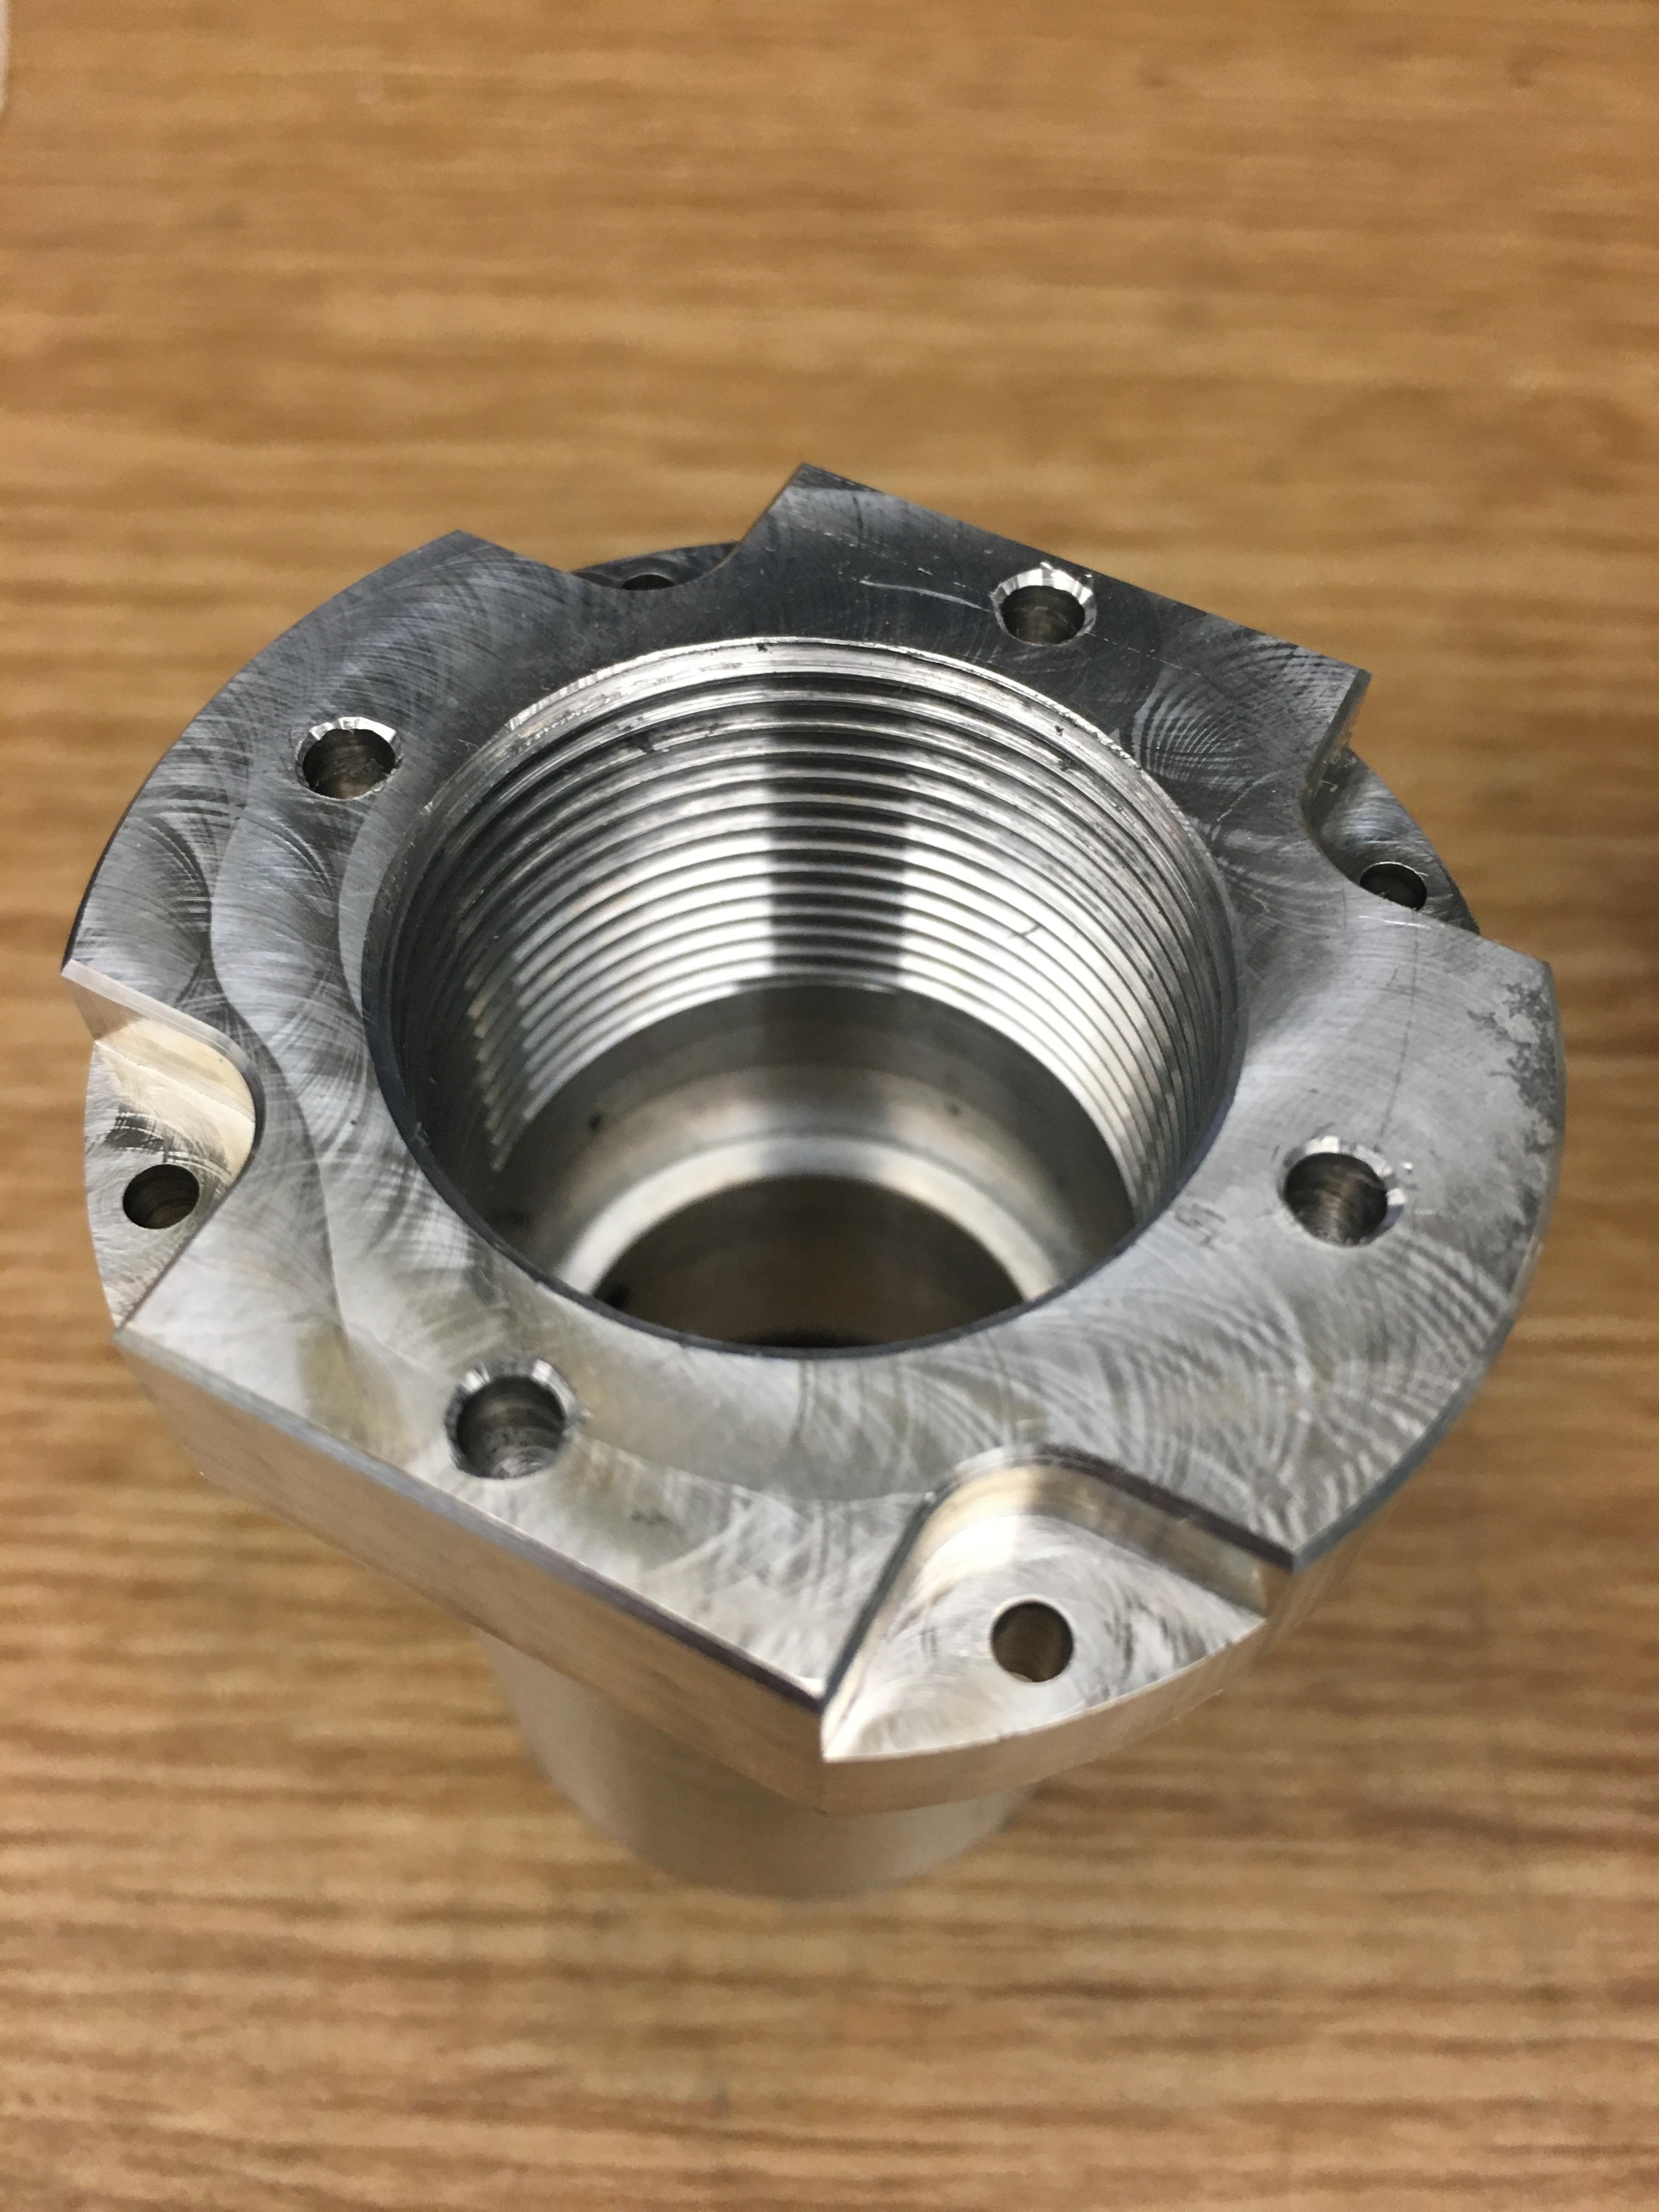
The size of a twin bed, HEX’s former hexapod design suffered from serious flaws that caused screws to shear at the joints. I redesigned the entire leg to increase its structural stability by removing the need for screws. Using the FEA software built into Solidworks, I calculated the expected torque at each individual part with a safety factor of 3. The maximum torque and forces to be experienced by the leg was assumed to occur when the hexapod is about to lift its body off the ground. Once defining the material as 7075 aluminum, I meshed the model and ran the simulation, finding that the part would not fail and then backing up my findings with my hand calculations.
Computer Numerical Control Operations
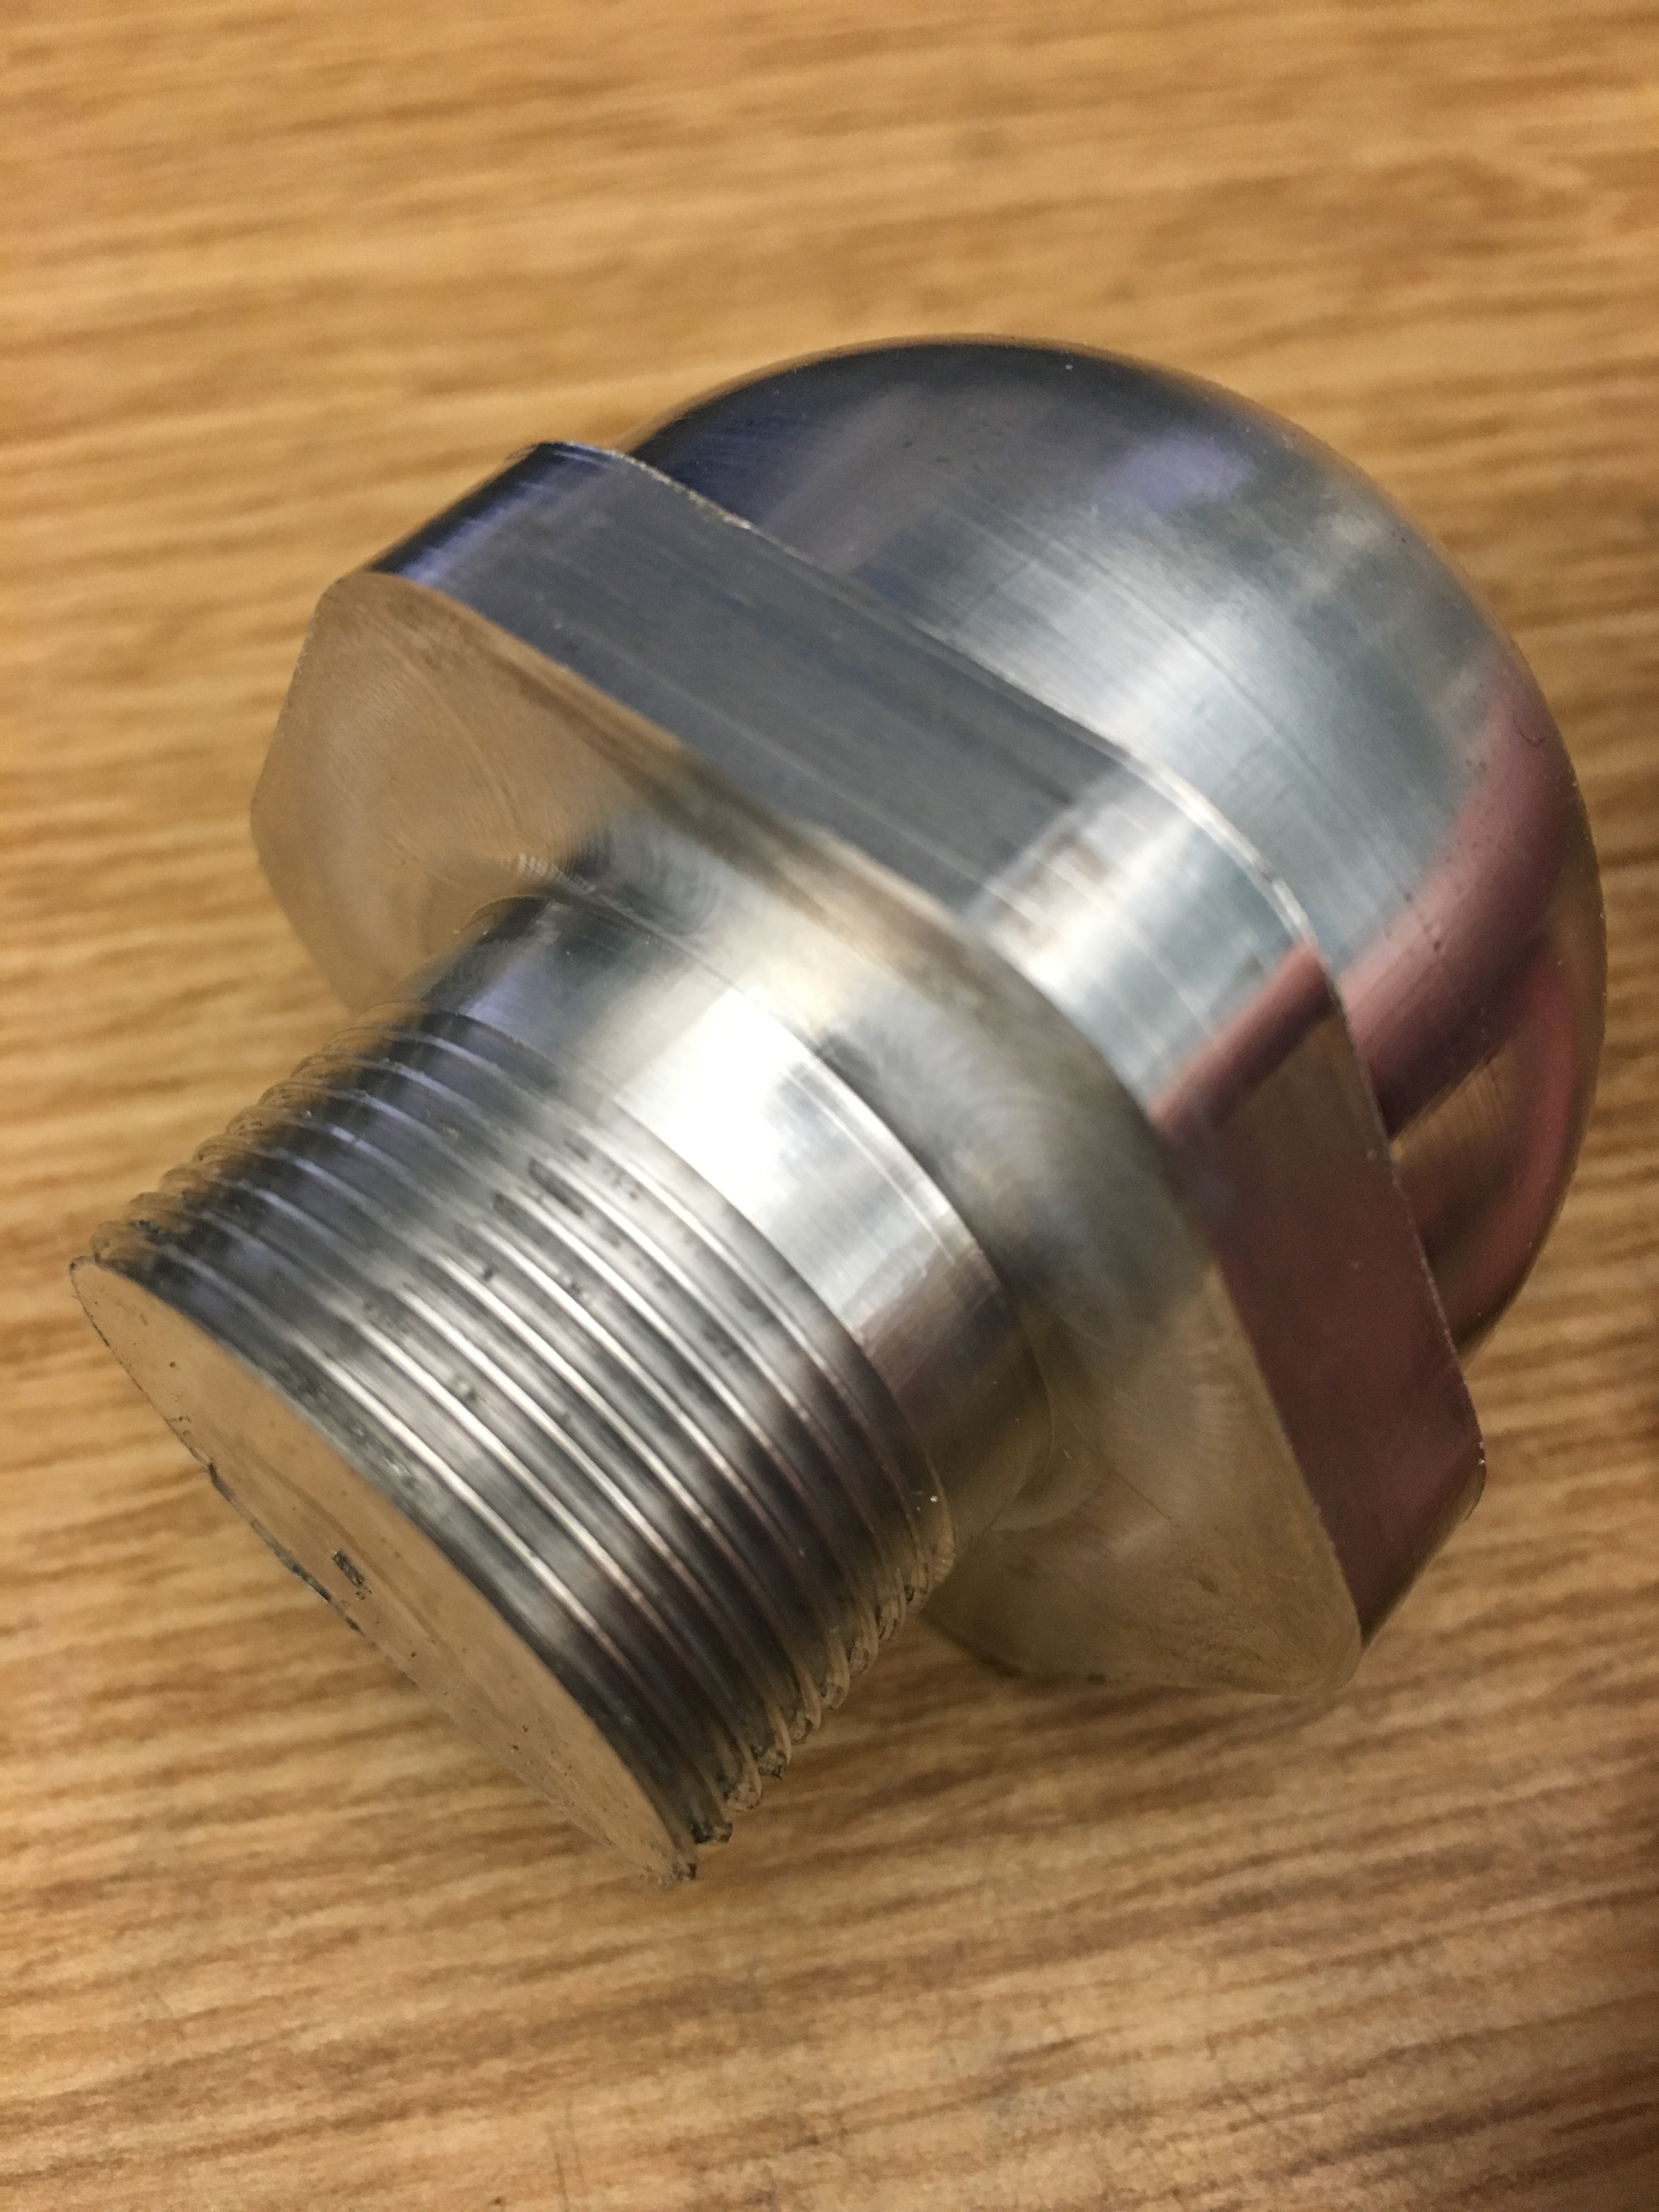
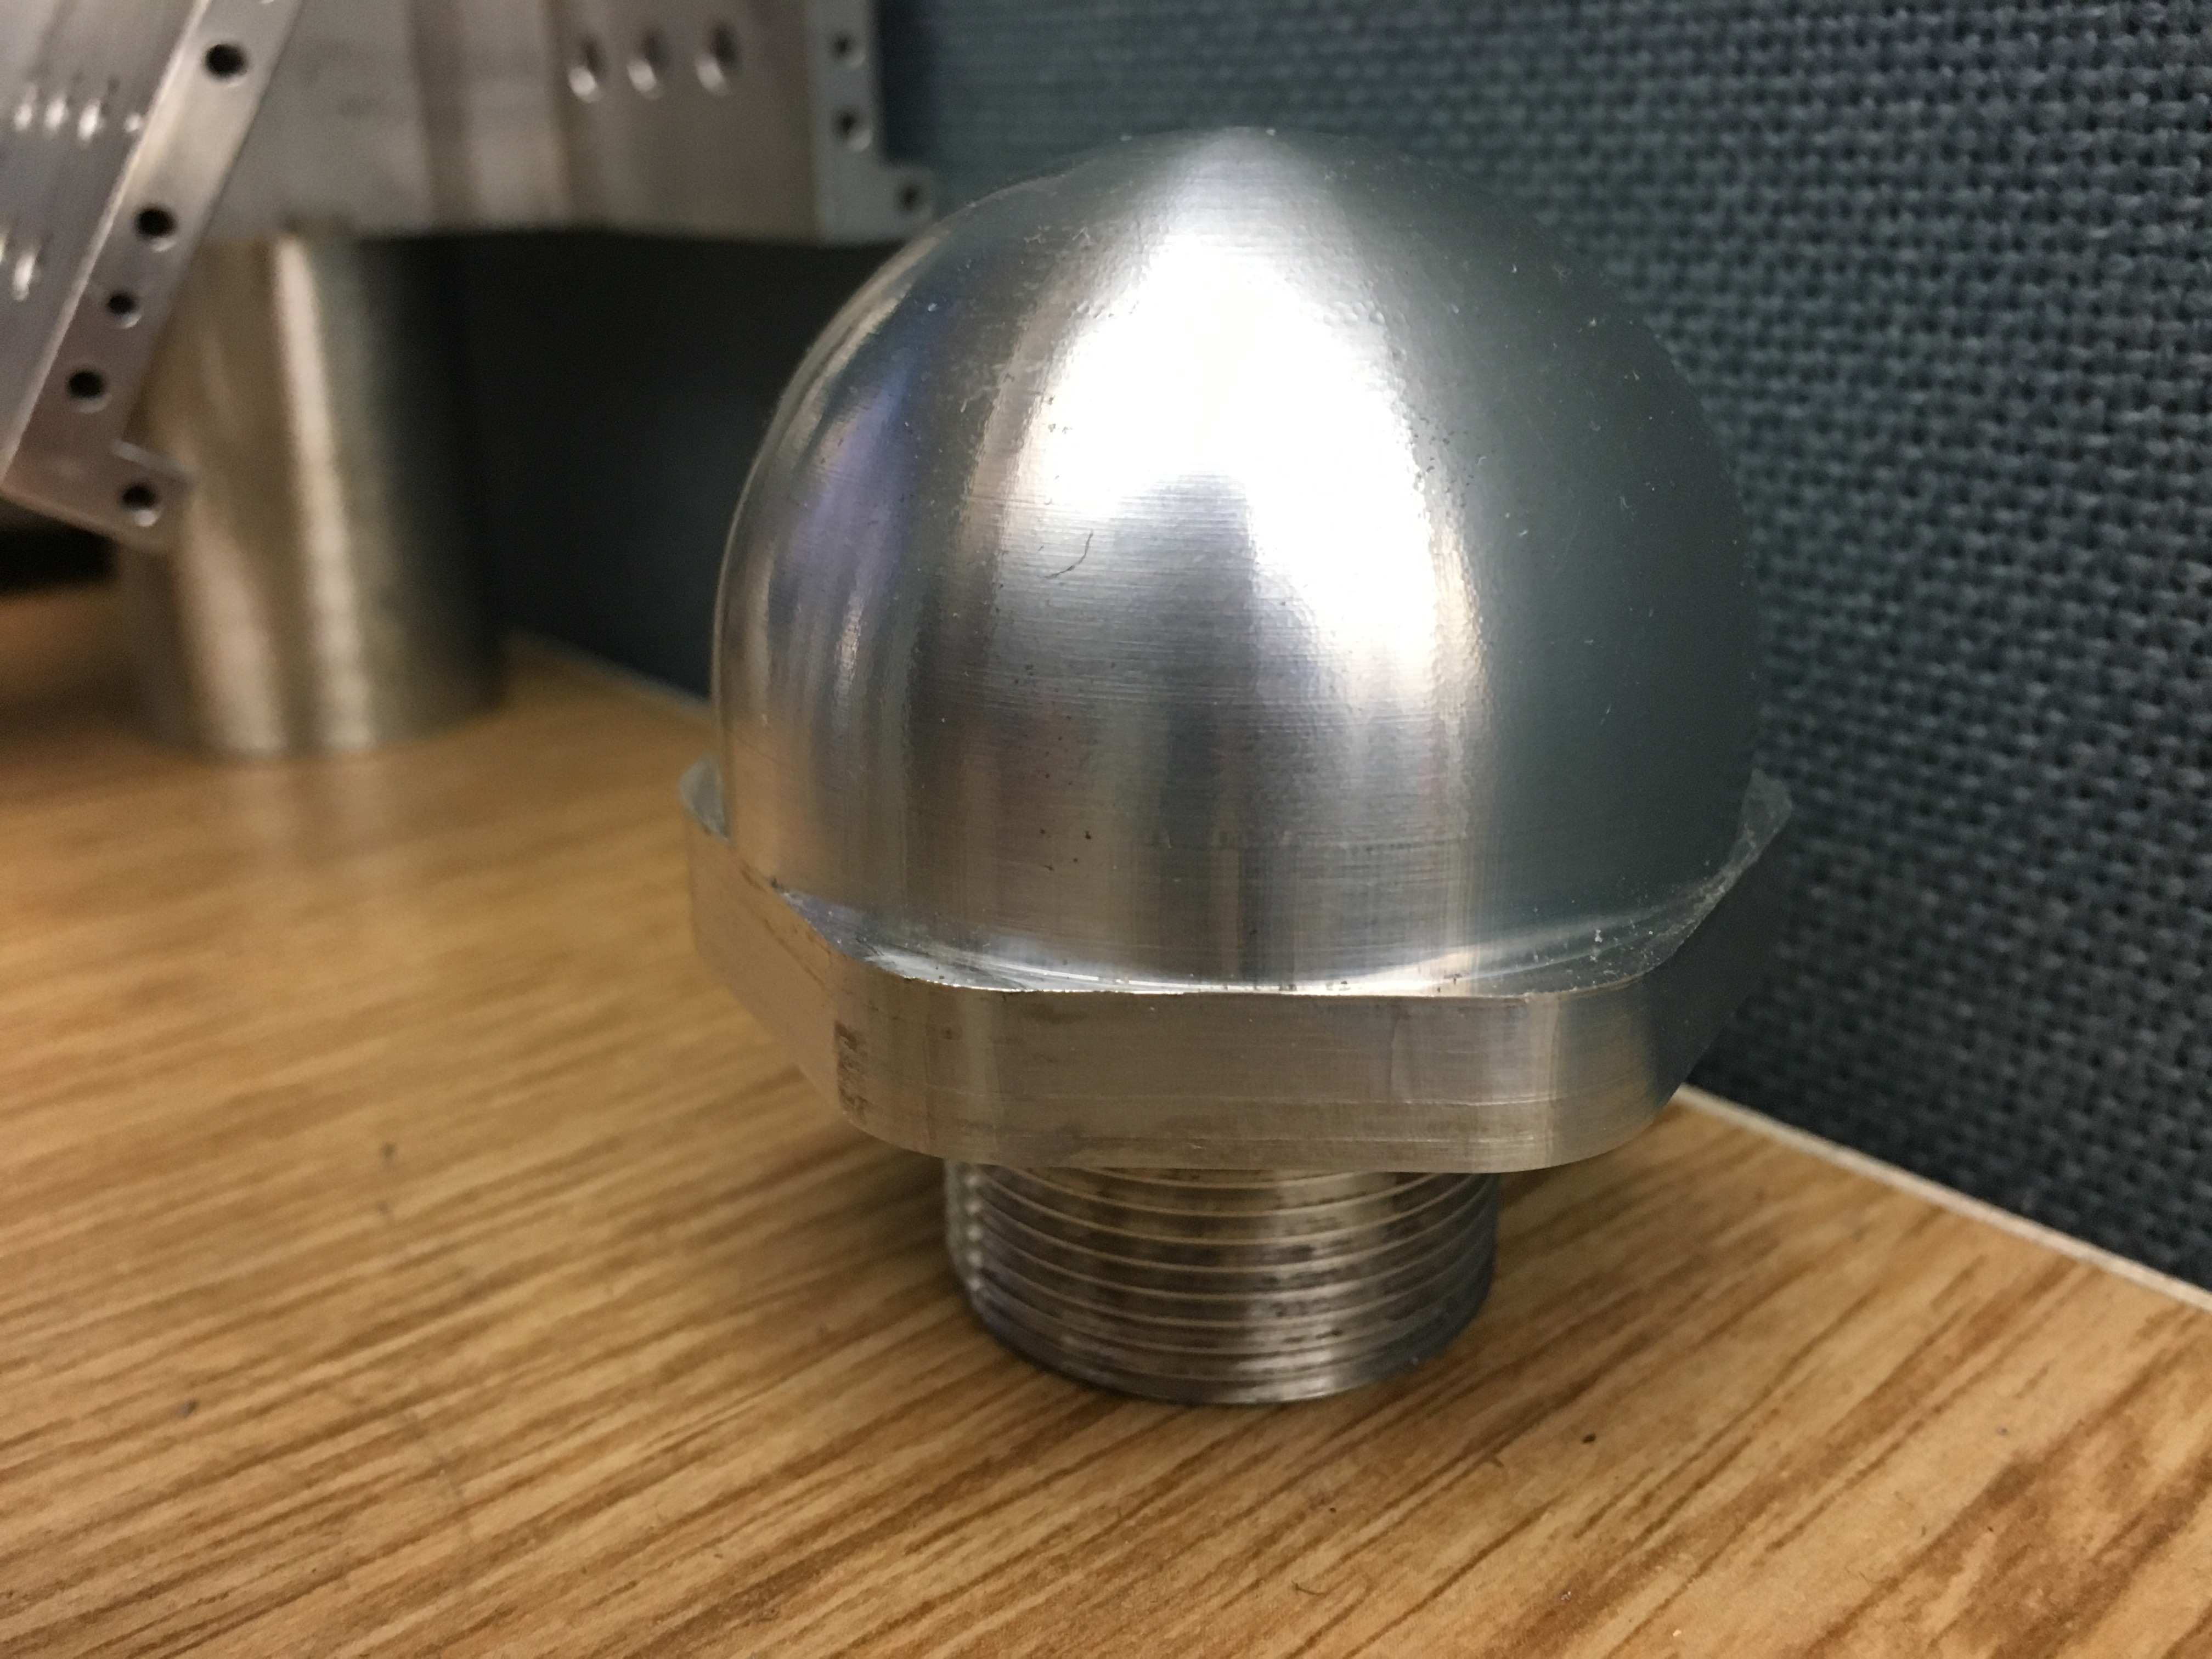
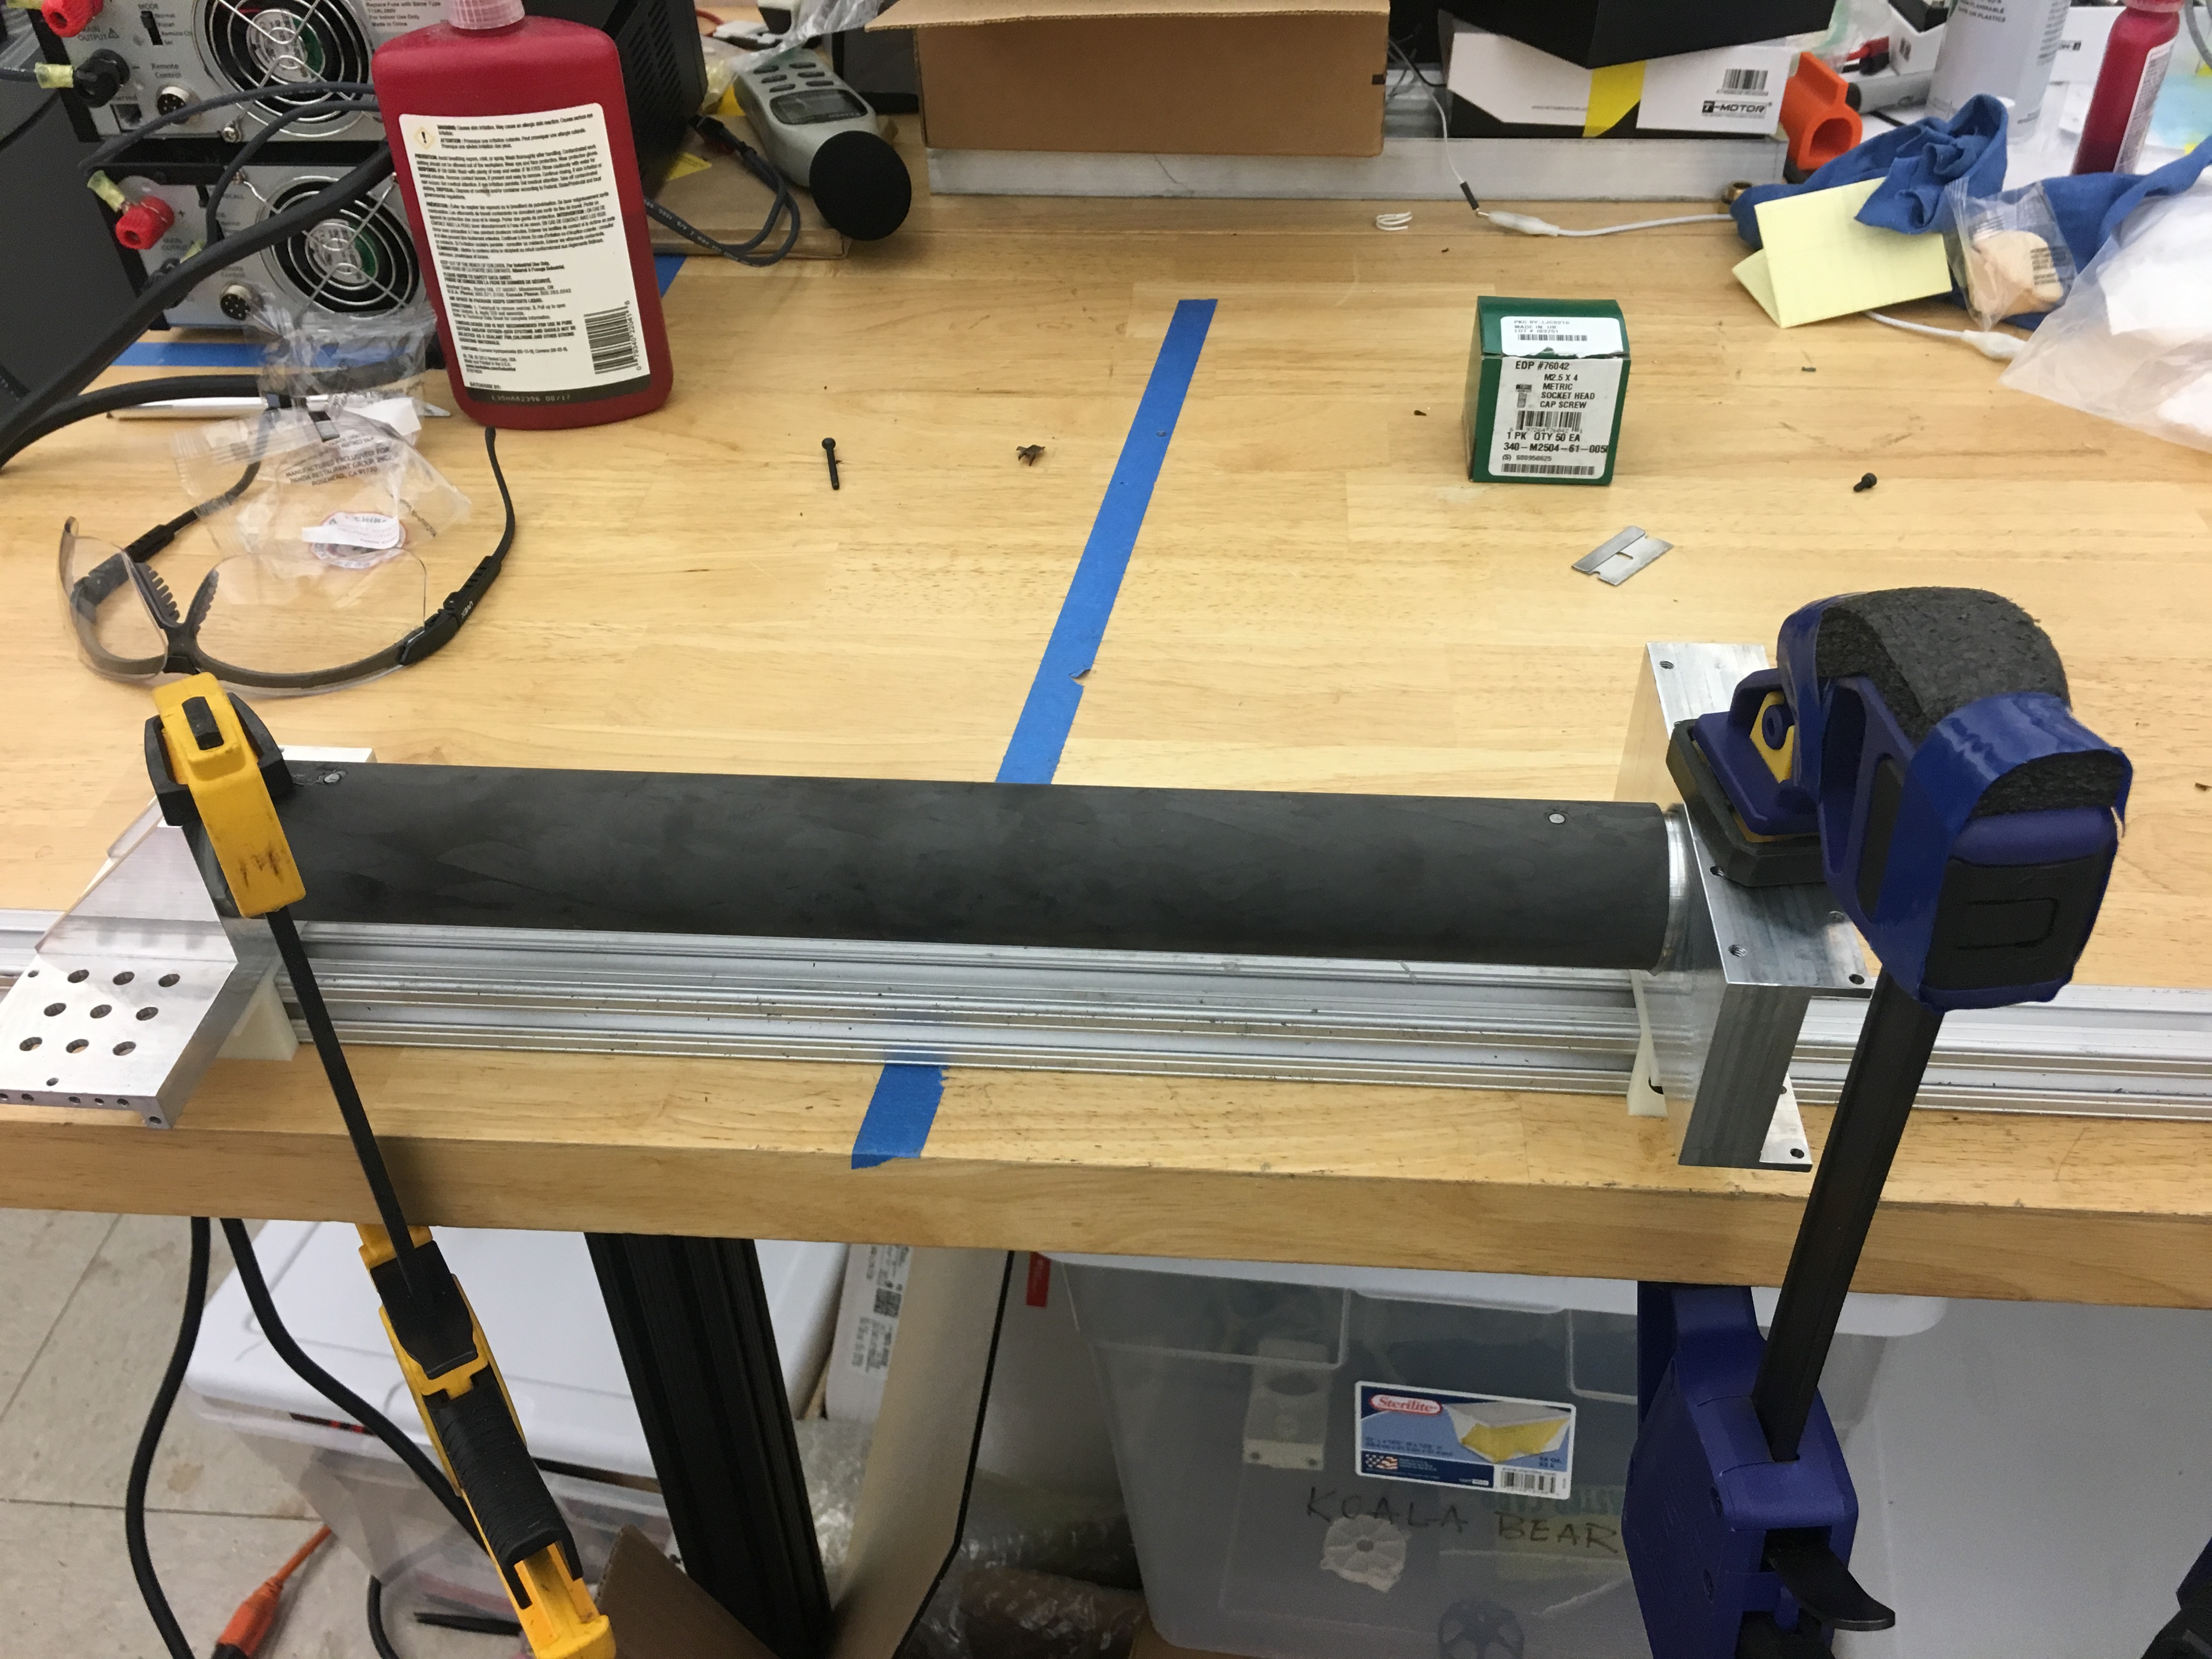
I modeled the components so I could make them with advanced operations on the CNC. The parts at the knee joints required six different orientations to mill out all of the features, while the tip of the feet required thread milling and hemispherical ramping. Every design demanded aggressive material removal with the shear hog and machining within close tolerances. The programming was done on HSM Works, a CAM software. In total, the CNCing of all 30 parts took around 100 hours.

Carbon Fiber Drilling and Gluing
Carbon fiber tubes connected the joints together, but the tubes needed to be aligned so the joints were positioned at the correct angles. To do this, dowel pins were utilized to align the tubes with the machined joint parts. A carbide diamond-patterned fishtail drill bit was employed to avoid cracking the carbon fiber on the CNC. Isopropyl alcohol, KimTech cleaning wipes, and sandpaper prepped the surfaces for gluing. 0.007” glass beads were mixed with the epoxy to maximize surface area, increase adherence, and reduce slop.

Aesthetic Covers
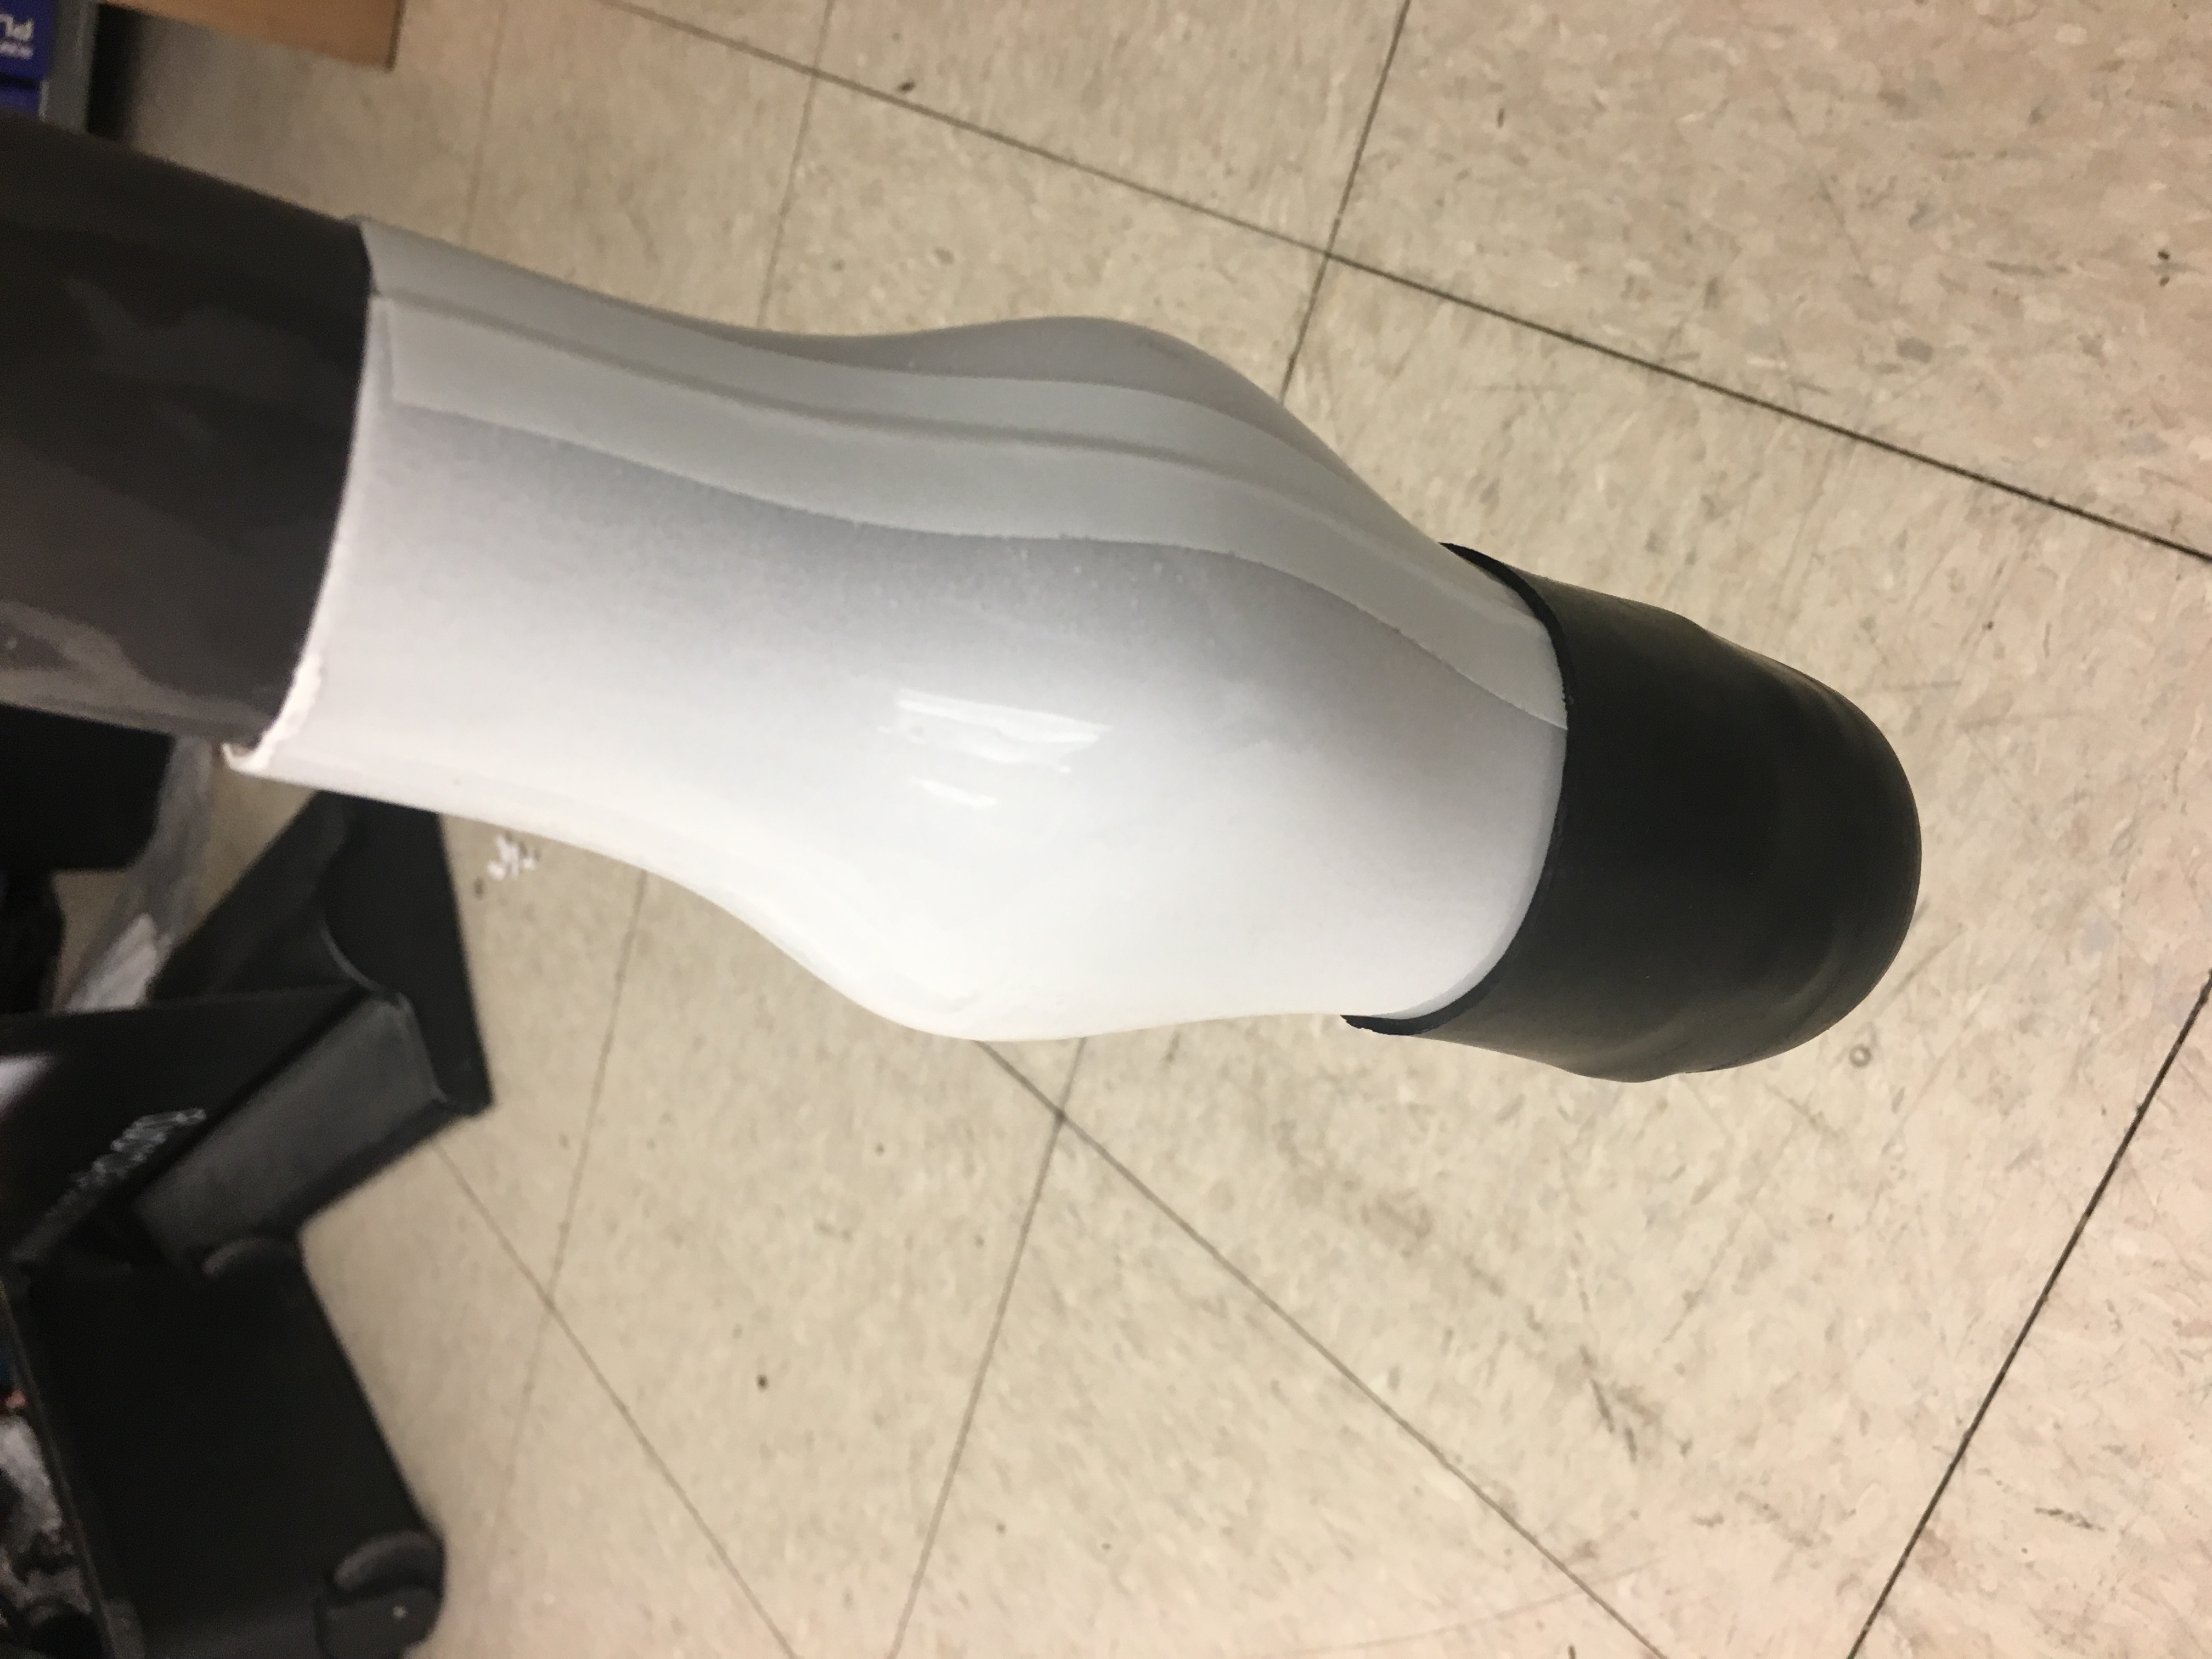
To make the curved covers, a mold was first 3D printed, sanded, and smoothed with acetone. Sheets of clear PTEG were used to vacuum mold thin, lightweight covers. The inside of the covers were spraypainted white. The tips of the feet were covered with rubber caps for both aesthetic and impact reduction purposes.